Account Registration Management
Using the custom fields feature of learningBOX, you can set up "add required fields or remove unnecessary fields when registering members".
You can freely edit and manage the items by yourself, and you can set "add necessary items or remove unnecessary input items at the time of member registration".
What is the editing input fields?
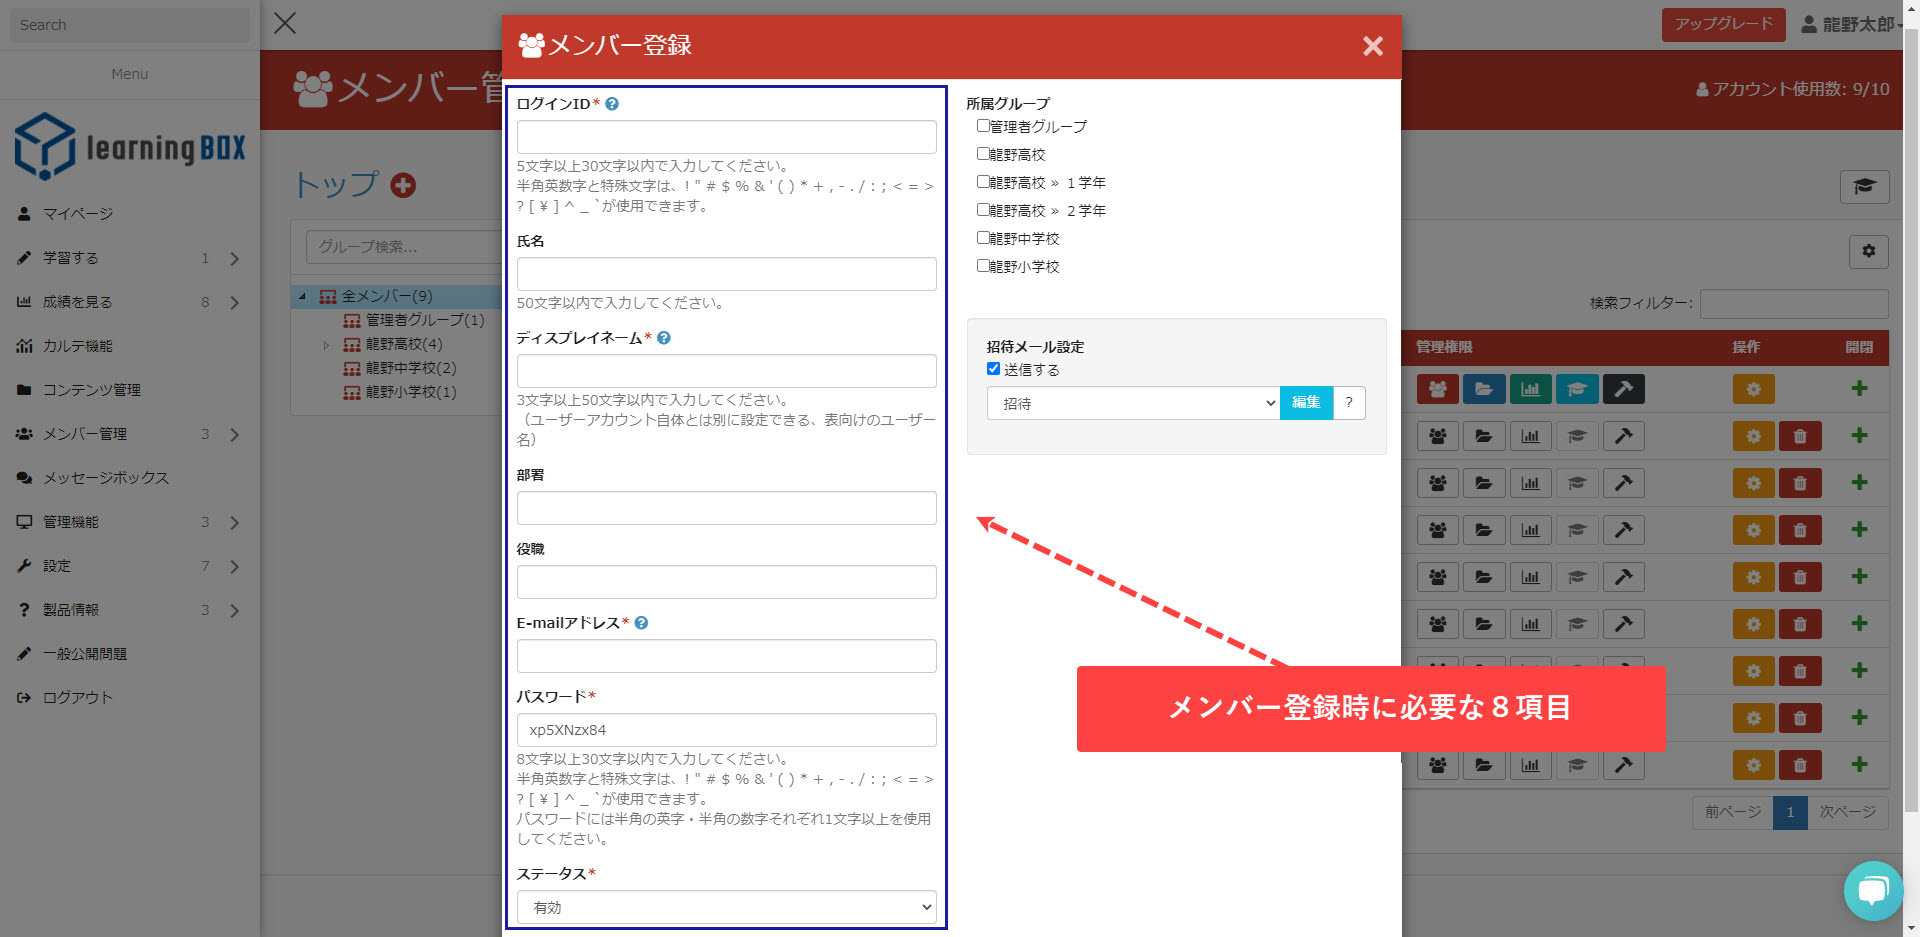
By default, in version 2.13, [login ID, name, display name, department, position, email address, password, country of residence, language, status].
In 2.14 [login ID, name, display name, department, title, email address, password, country of residence, language, time zone, status, expiration date].
so please change to one of them if necessary.
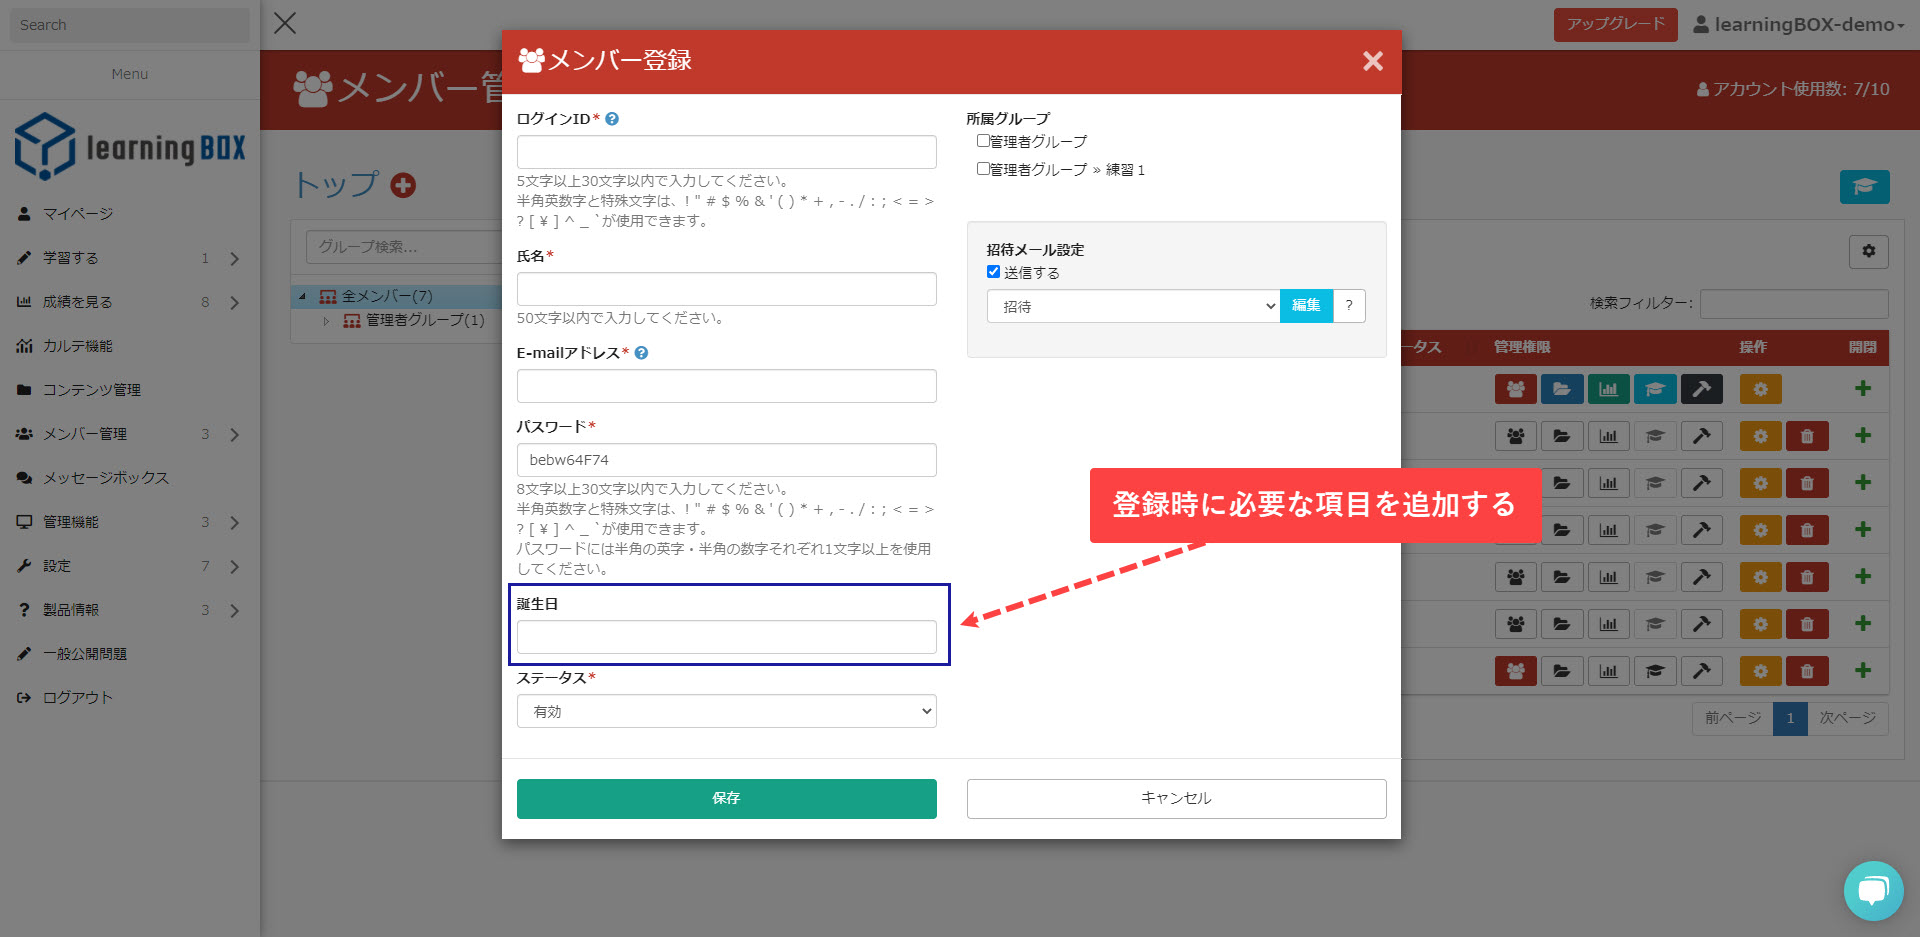
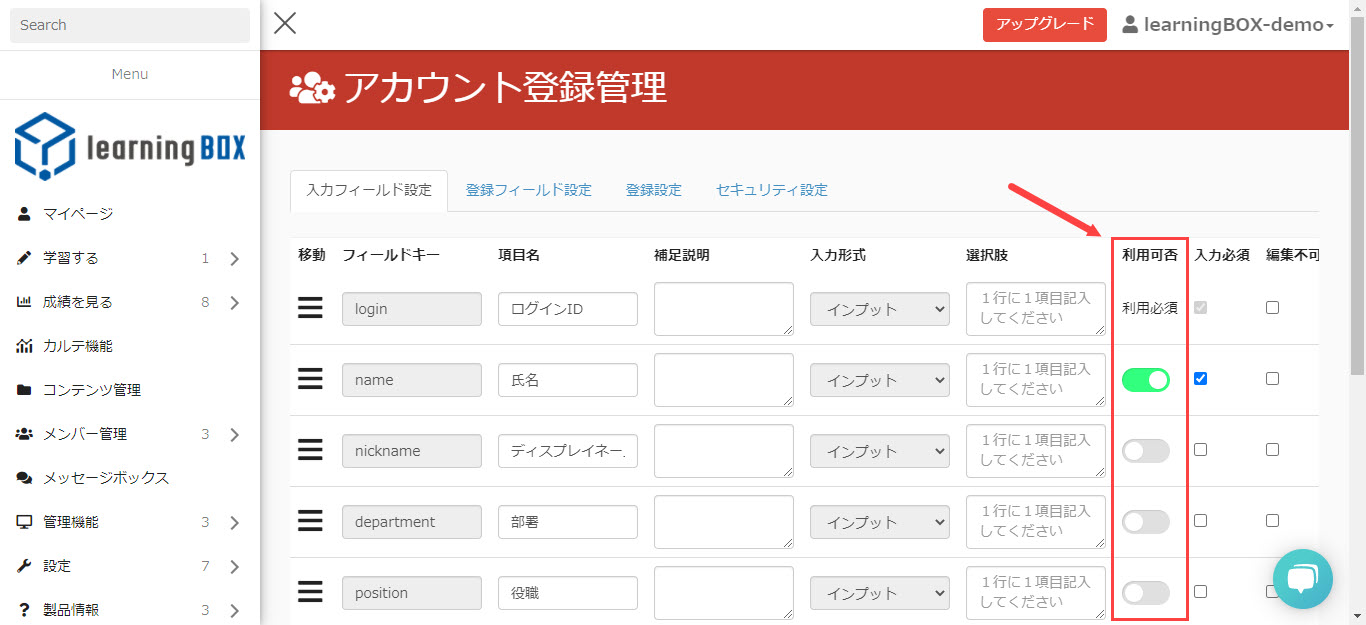
▼ Settings screen when registering as a member (default settings)
Member registration using the editing input fields
▼ Reduce the number of items

Add a new item.
How to edit input fields
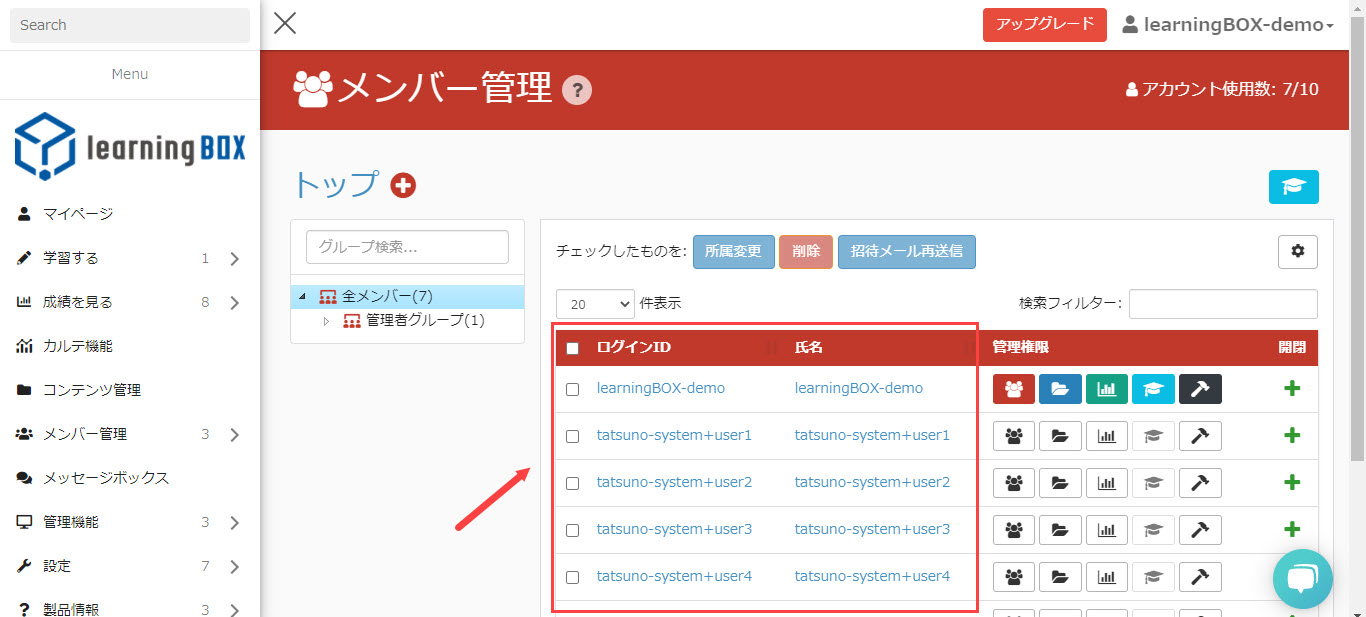
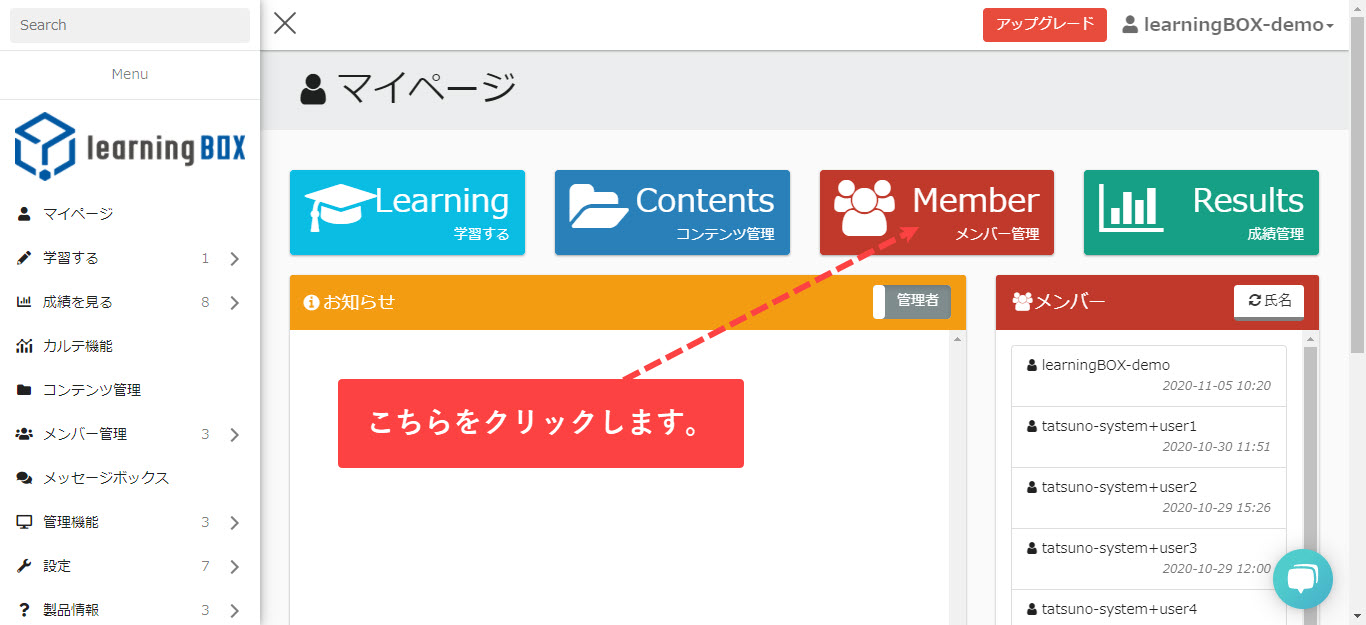
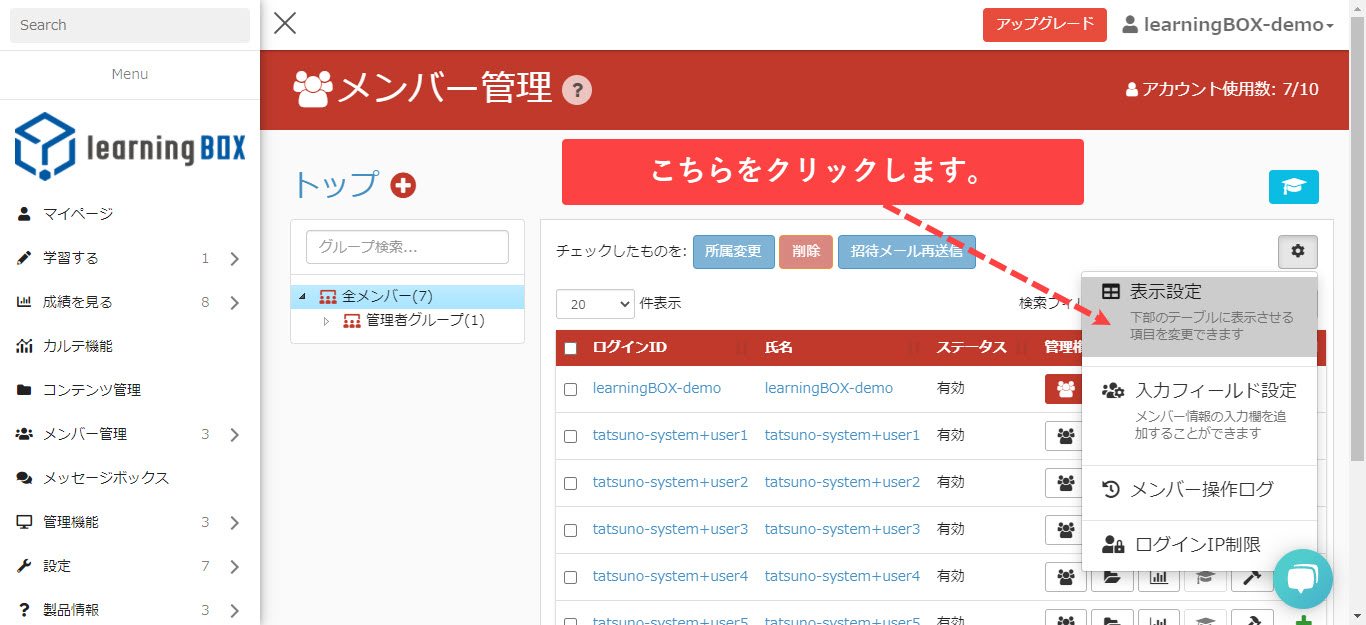
Sign-in as the learningBOX owner account, a user with Member Management role, and click Manage members.
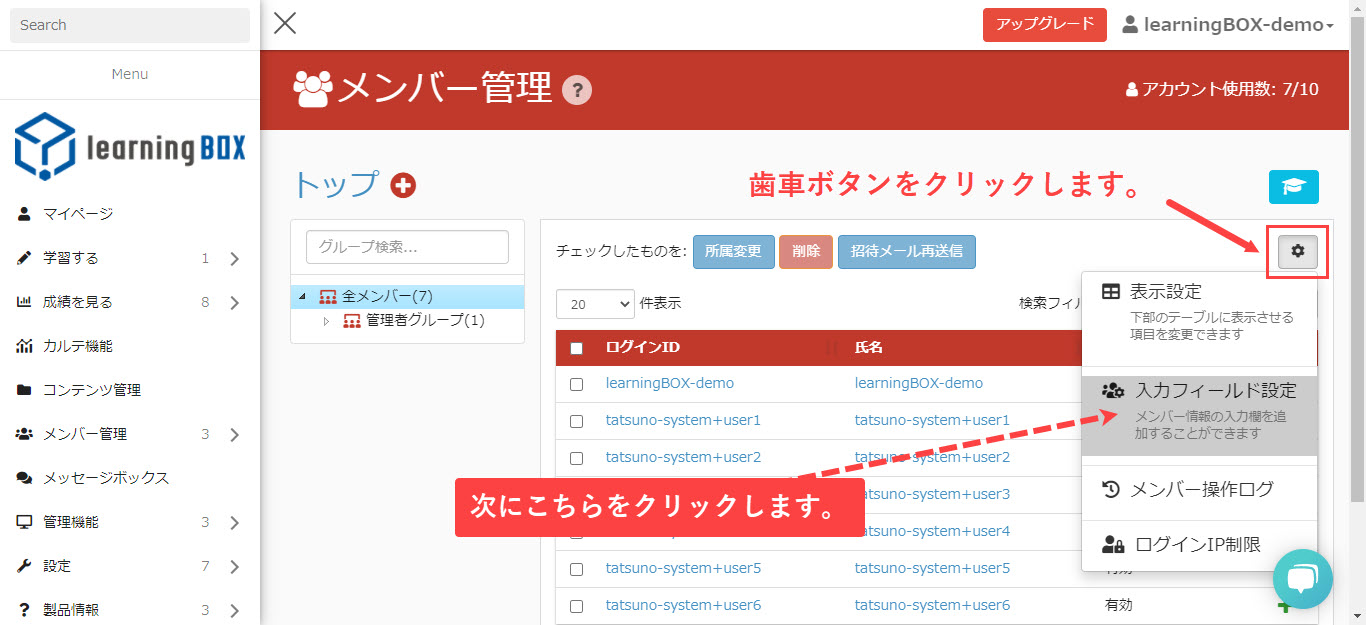
Click the Gear button and then click the Input fields Settings.
The input field settings screen will be displayed. From here, you can freely edit and manage the fields required for member registration.
Please note that you cannot remove your sign-in ID and password from an item.
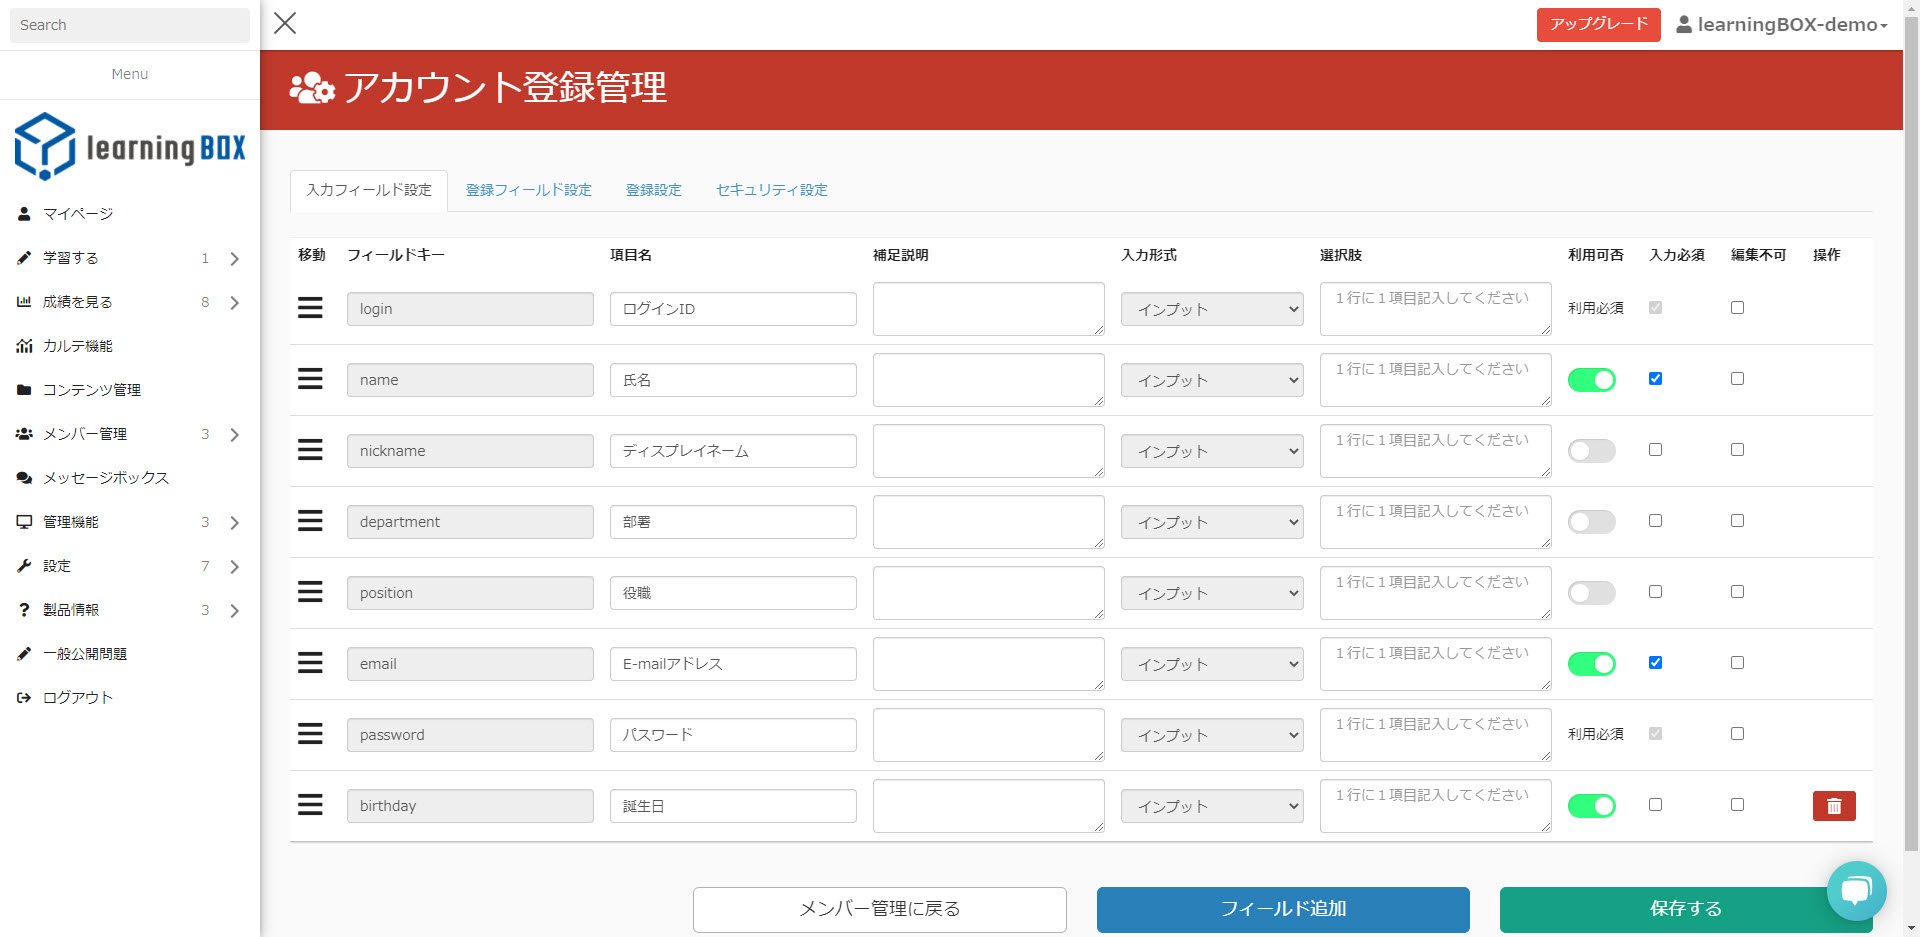
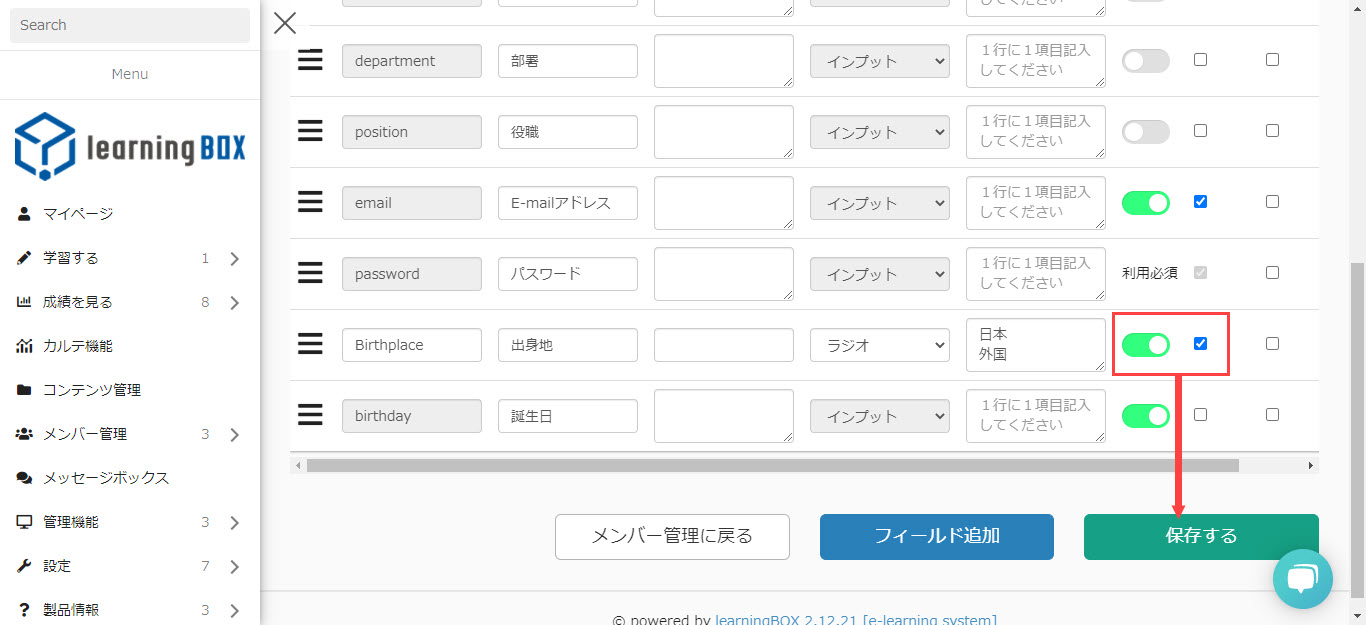
You can choose whether or not to use the field by toggling the availability switch.
The green status indicates "Use" and the gray status indicates "Do not use".
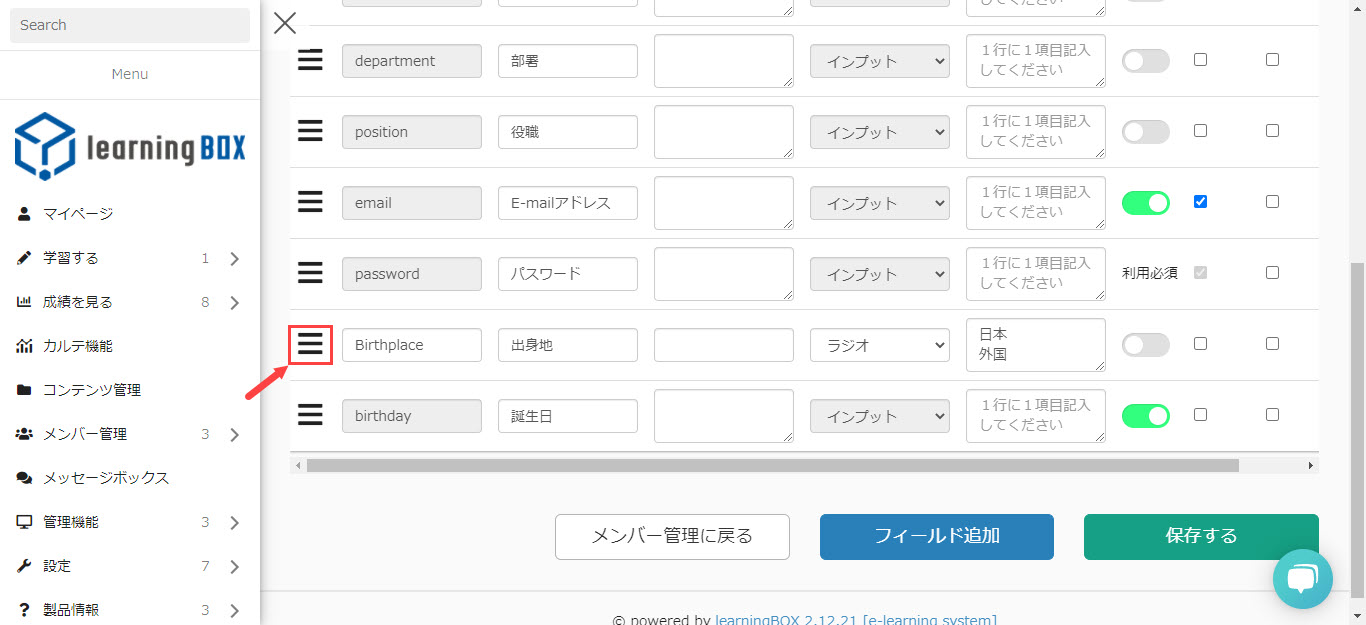
Click Add to insert a new field at the bottom.
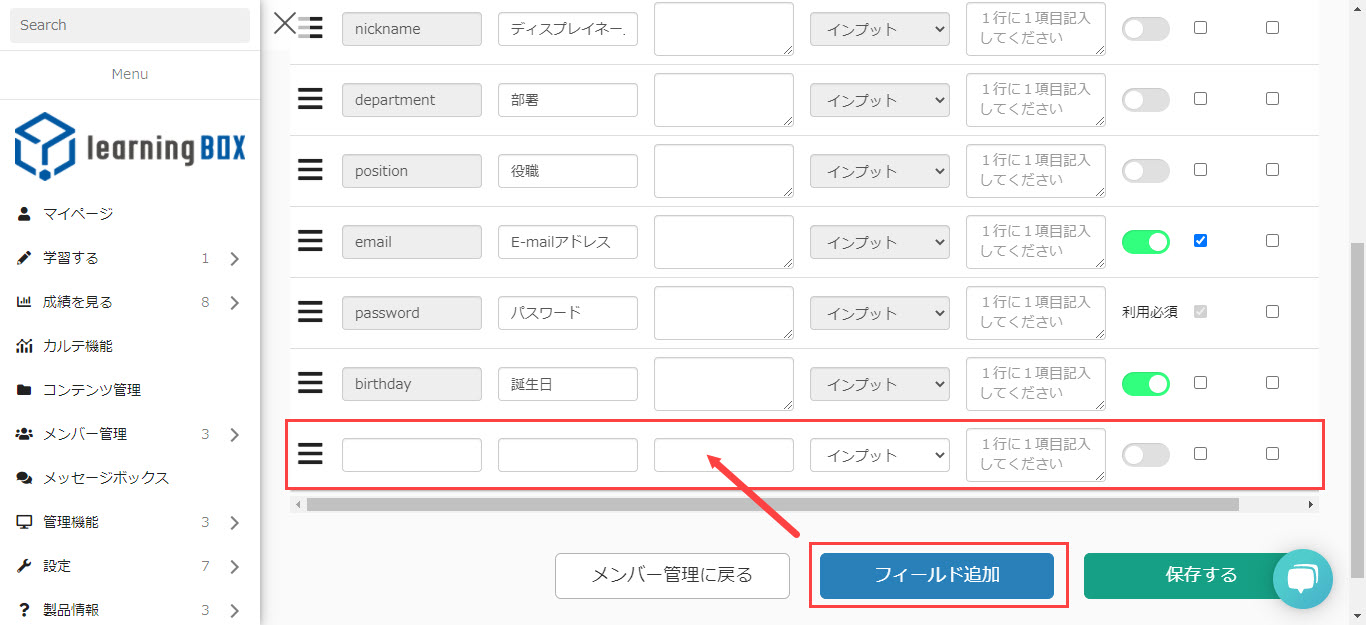
Enter the field key in half-width alphanumeric characters, and then enter the item name. If necessary, enter a supplementary explanation.
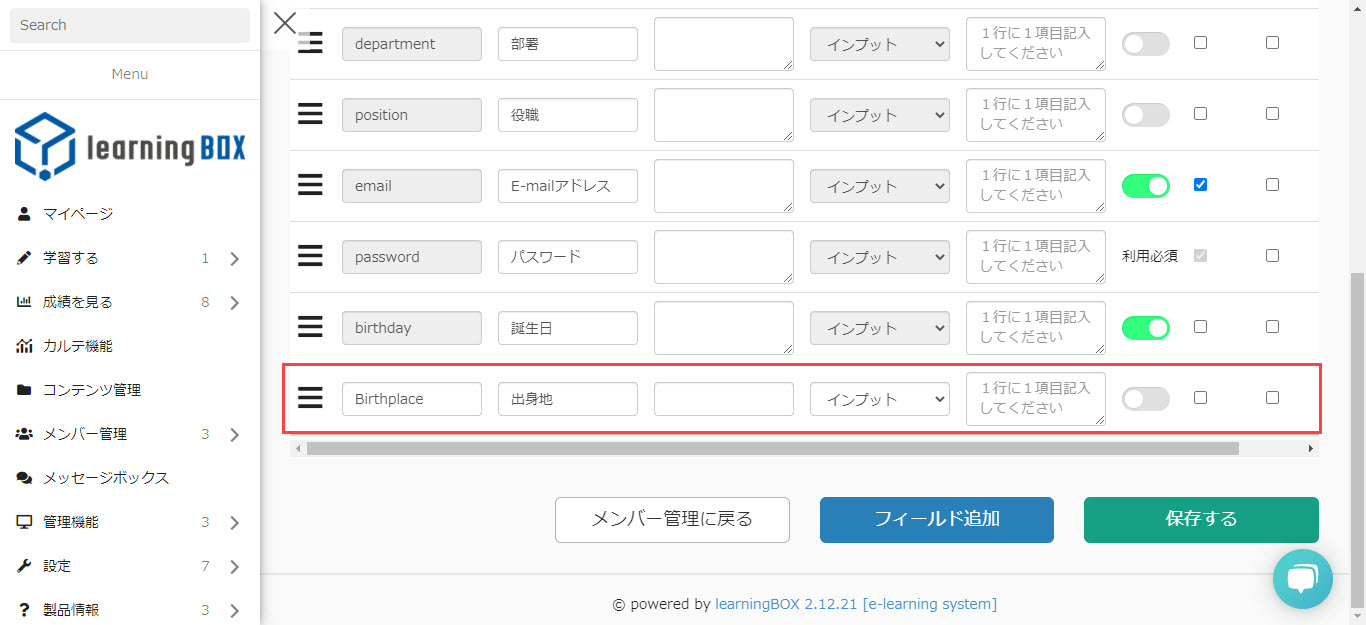
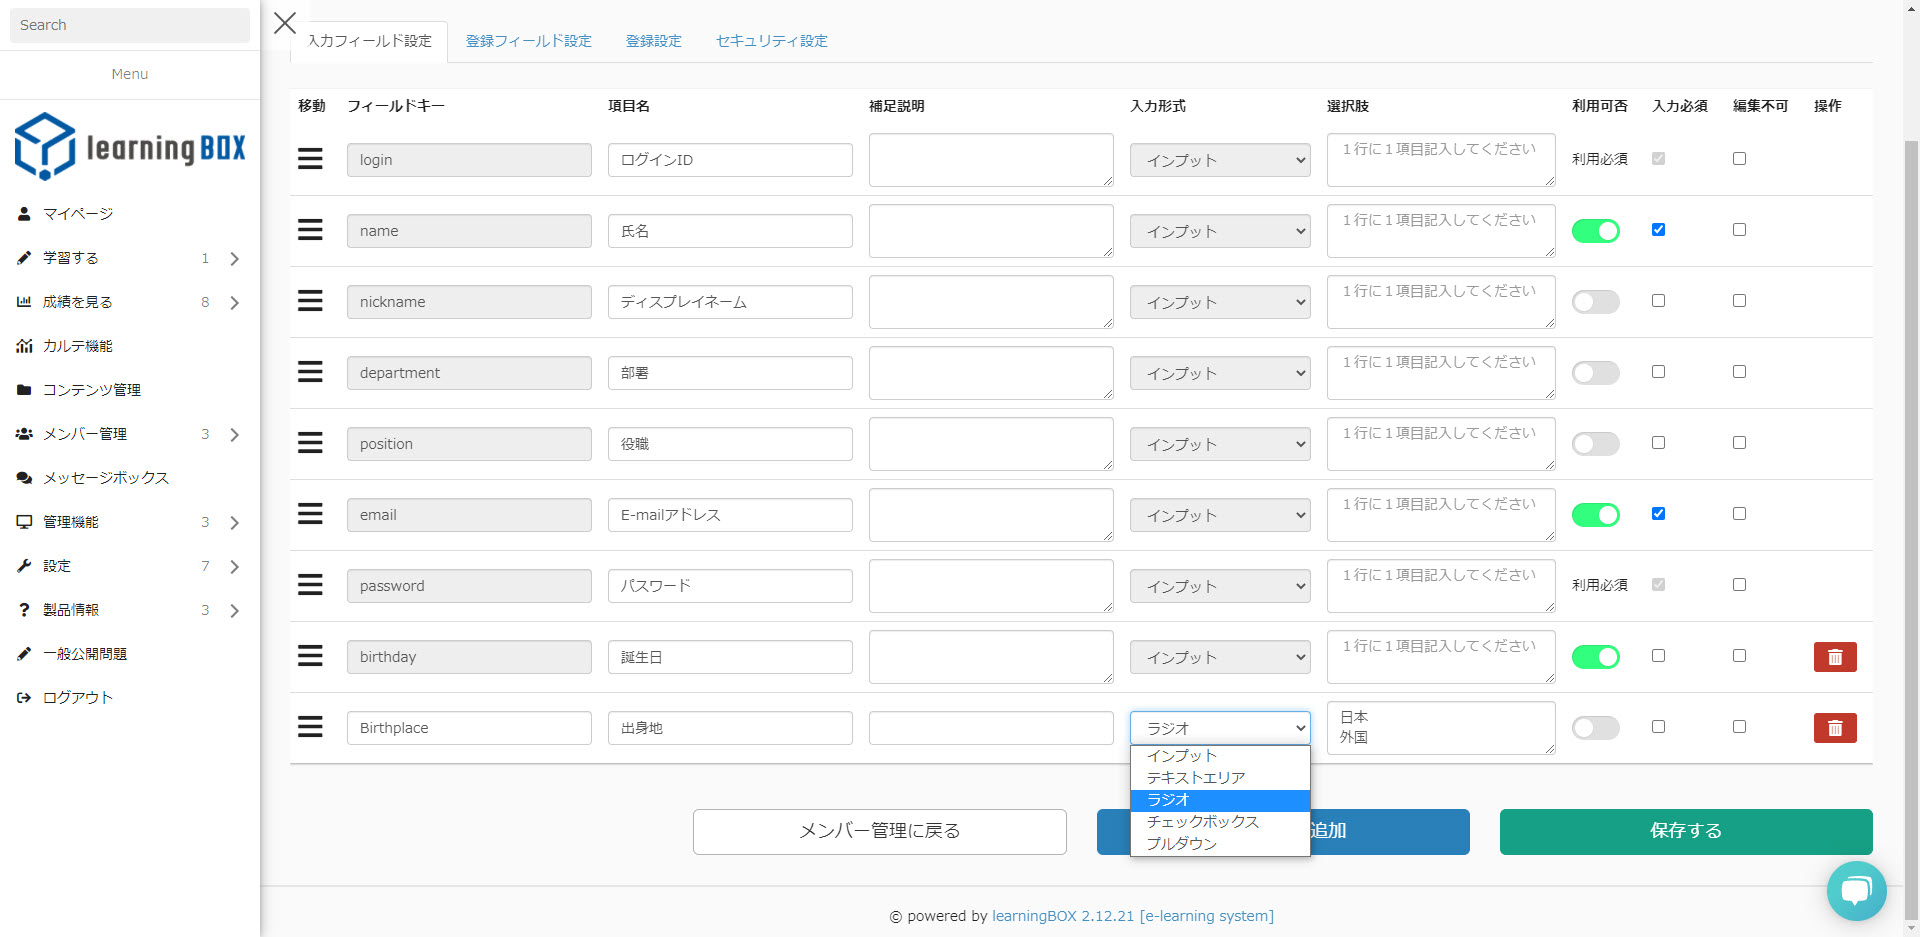
You can select the input format and choose from "Input, Text Area, Radio, Check Box, and Pull Down".
For radios, checkboxes, and pull-downs, set the choices for the adjacent item.
Each new line is recognized as a choice.
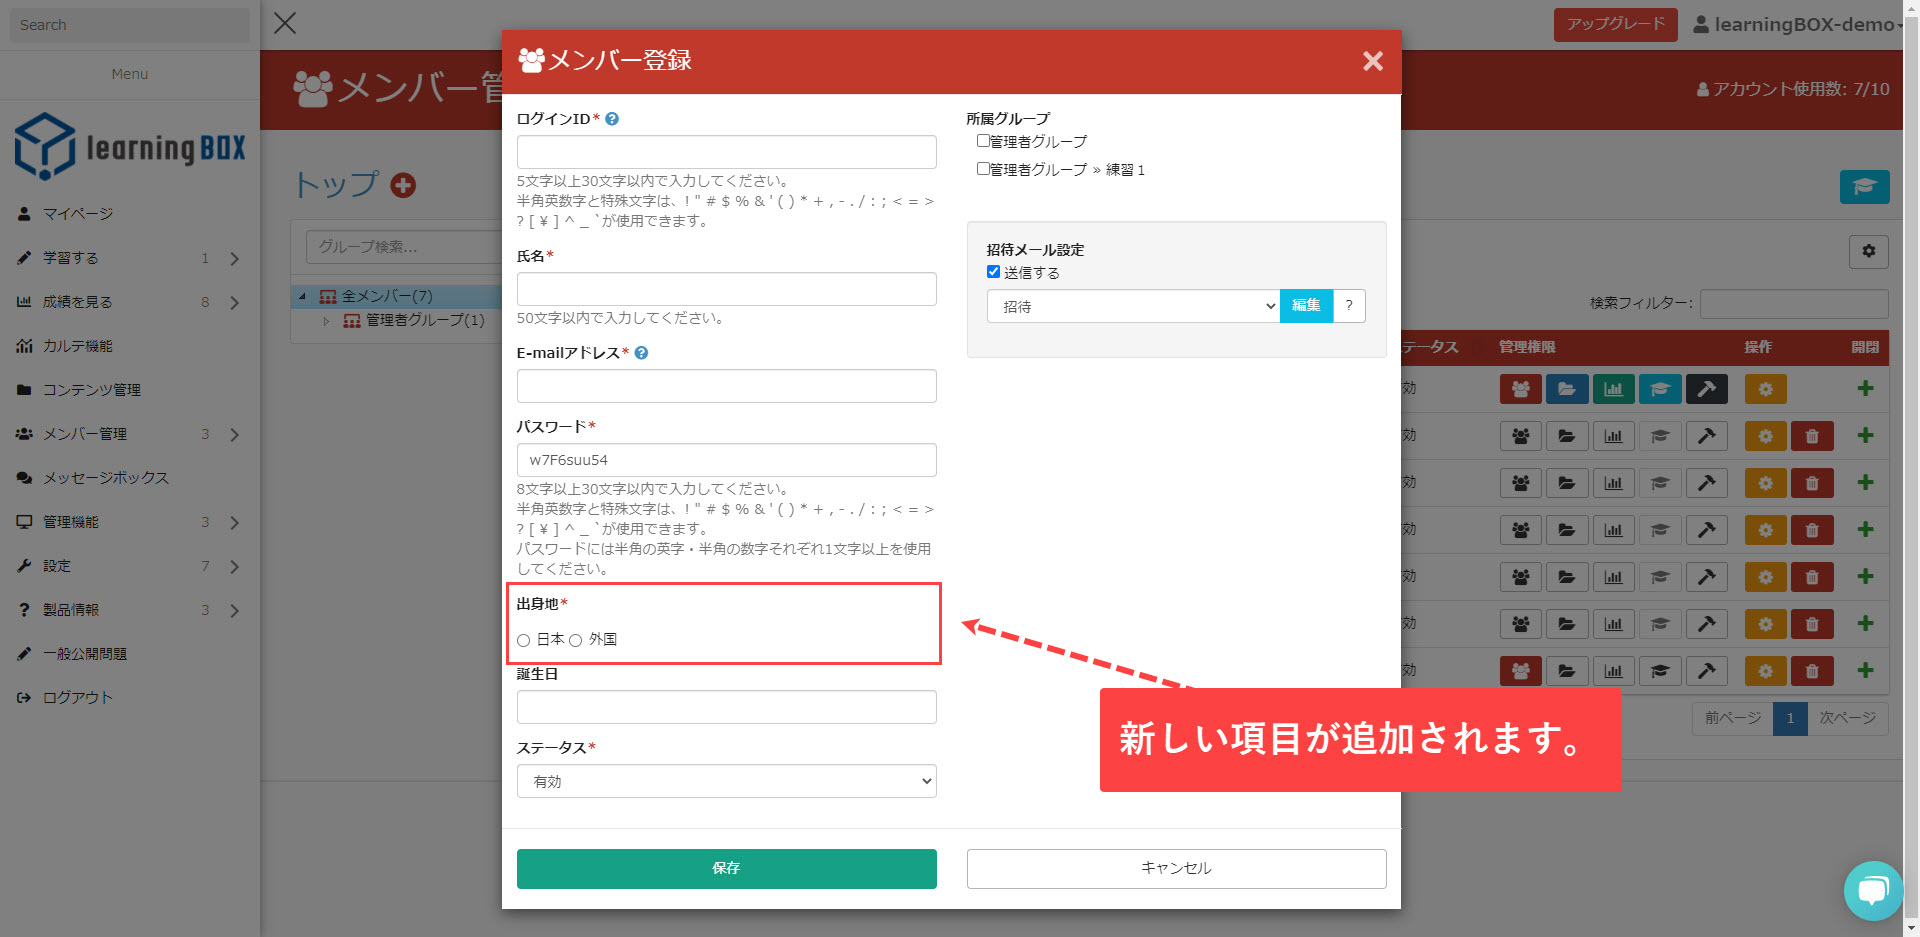
In the case of the image below, two options will be registered, "Japan" and "Foreign".
If you want to rearrange the registration items, you can drag and drop the 【Hanger Menu】 surrounded by a red frame to rearrange the input fields.
If you're happy, click Save and you're all set.
When you register a member after setting up the input fields, the registration items will be added as follows
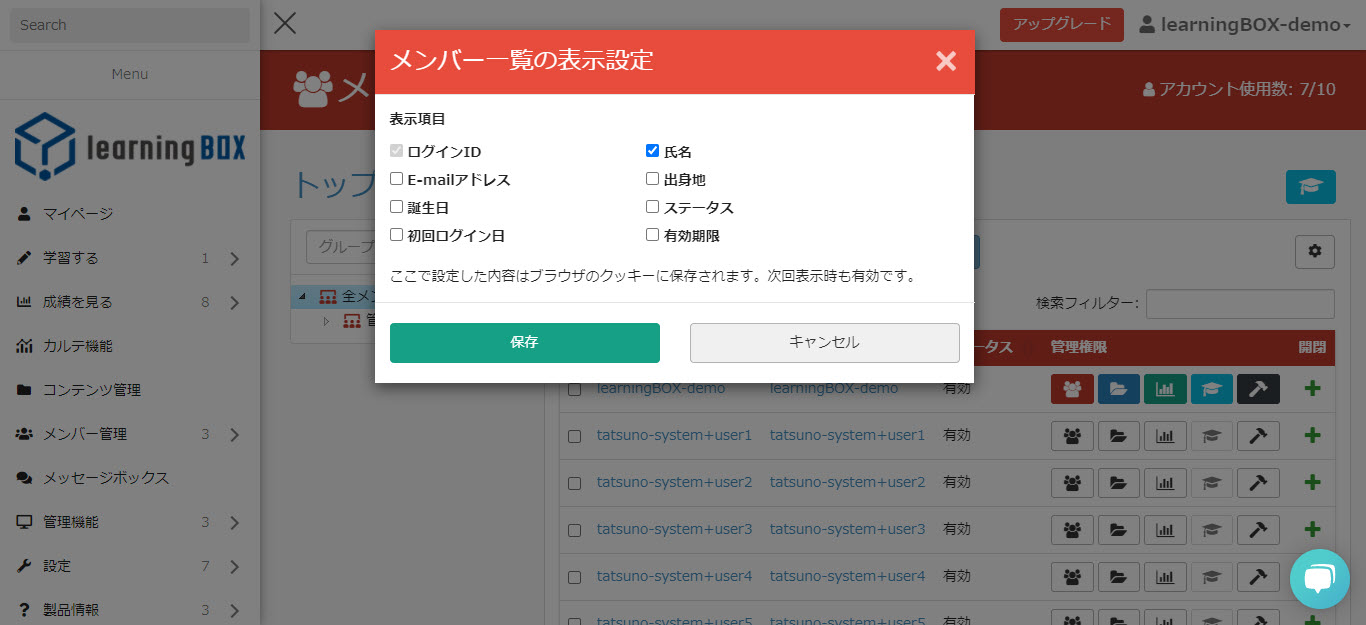
About the display setting function
You can now set the display settings for the member list to match the input fields. By setting this feature, you can hide information that you have added but do not want to show on the screen.
When the Member List Display Settings modal opens, uncheck the items you do not want to display and click Save.
Sin-in ID can not be unchecked.
When I look at the Manage members, it only shows Sign-in ID and Name