Memorization card
You can create your own flashcards on learningBOX.
This content can be added by an Excel file in addition to a text file.
Create memorization card
You can create Memorization card in the creation form or in the Text/Excel/Tsv/Zip file.
The following explain how to create the content in the creation form.
*When creating in a text/Excel file, refer to How to create memorization cards.
Required
【CARD-4.0】 or later, Content manager (Edit)
01. Create a course
First, create a course.
*For more details, refer to Course/Folder.
02. Open the creation form
Click the course you have created, and click the "+" icon > Content > Memorization Card > Create
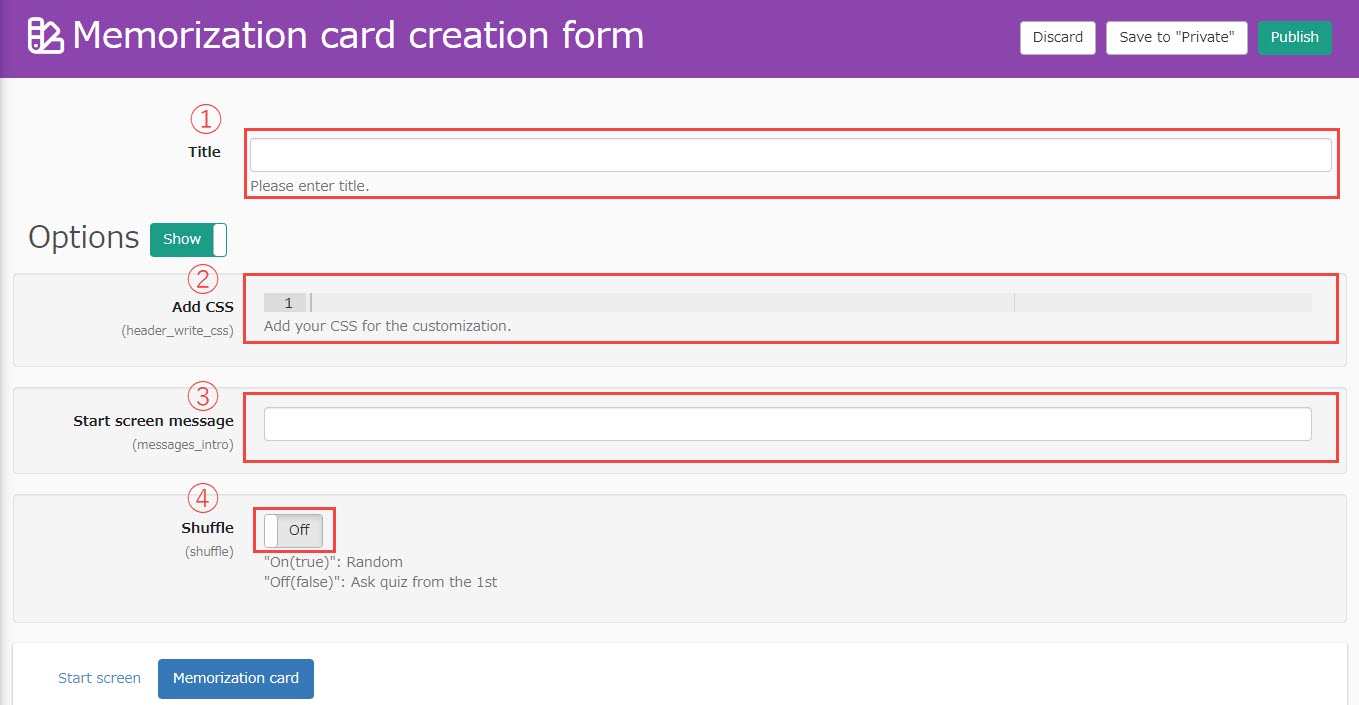
The following explain each item:
① Title: Enter a title.
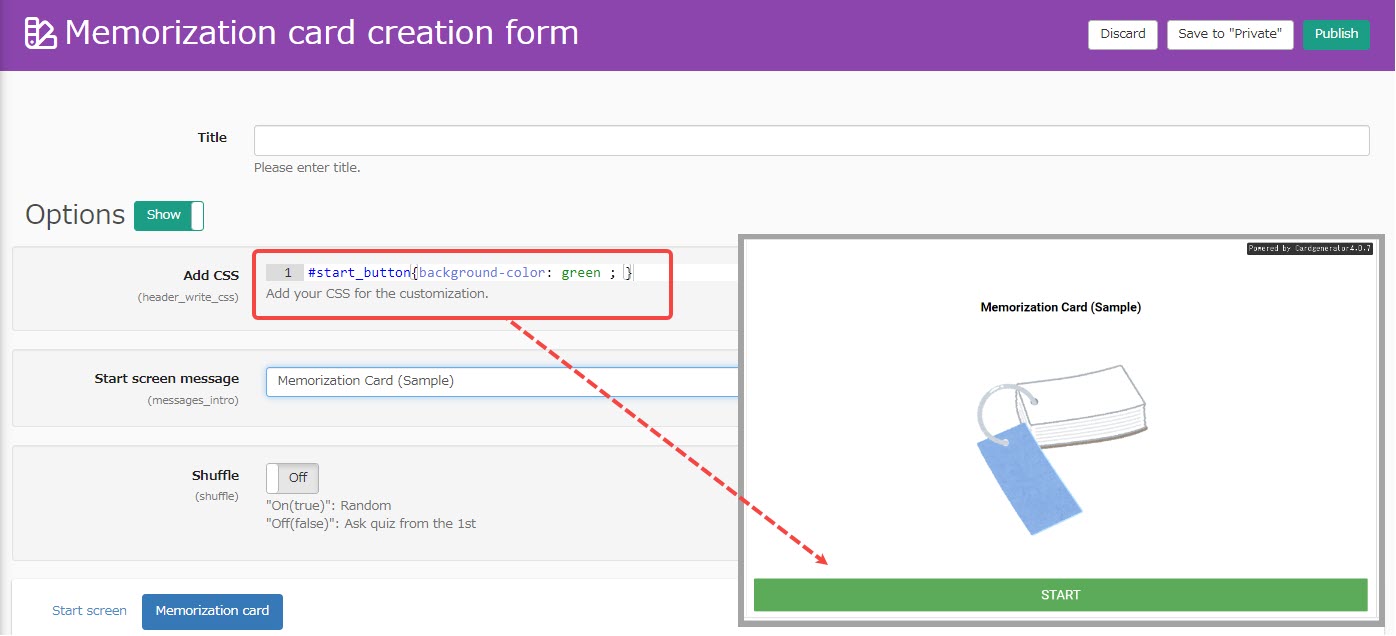
② Add CSS: You can customize the memorization card by writing CSS.
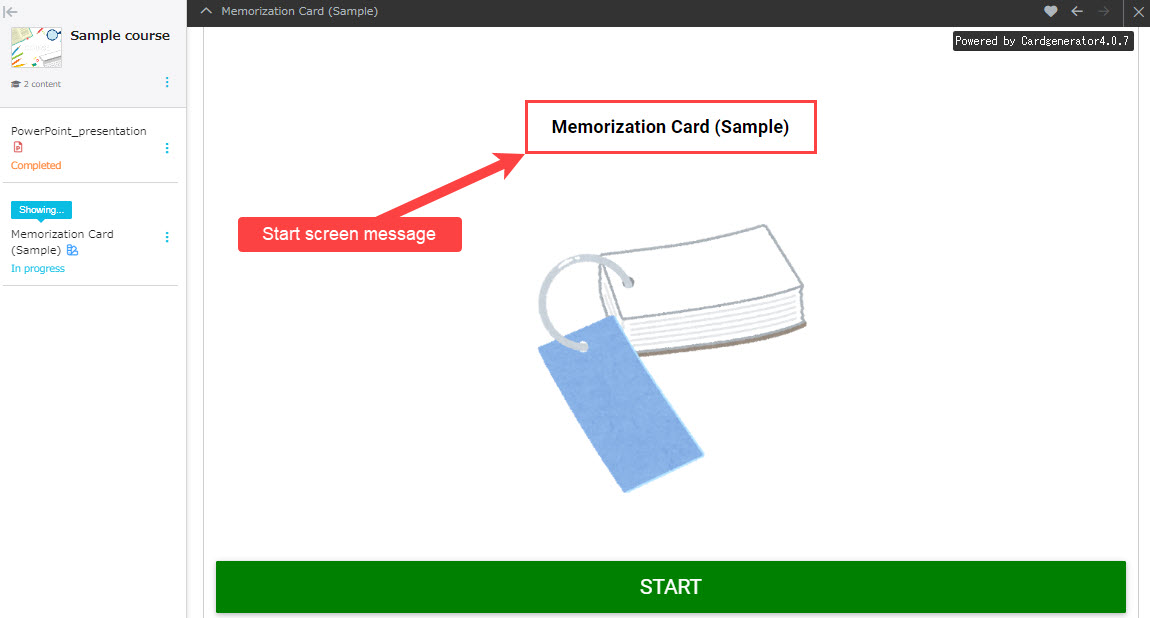
③ Start screen message: Enter the message shown to learners when they start this content.
④ Shuffle: The order of the cards will be shuffled.
*You can hide the options by turning off the toggle key.
▼CSS
e.g.) Change button color
#start_button{background-color: green ; }
▼ Message displayed when the learner starts the content
03. Enter text
⑤ Text field: Enter text to show.
⑥ Text field: Enter text to hide.
You can use this input field to decorate the text, including font size and color.
In addition to text, images, tables, audio files, and chemical formulas can be inserted.
⑦ Preview: You can check the user interface.

When inserting an Image, audio file and chemical formula
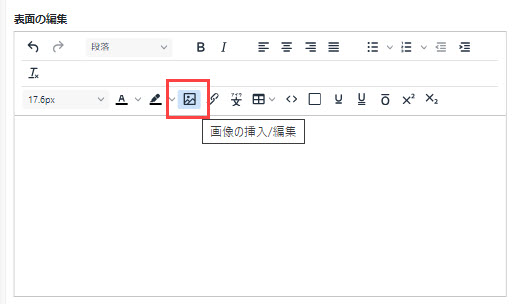
▼ Image
Click on "Insert/edit image" in the text field.
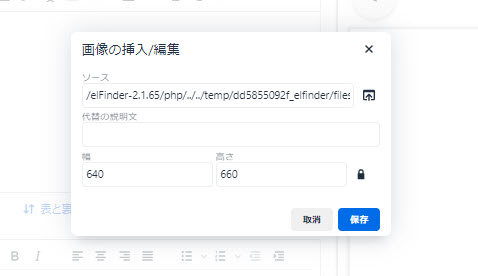
On the "Insert/Edit Image" screen, click the File Upload icon.
Drag and drop the image file, and double-click it.
Click "OK" and save the settings.
▼ Audio file
On the "Insert/Edit Image" screen, click on the File Upload icon, drag and drop the audio file to be uploaded, and then close the pop-up window by pressing the ✕ button in the upper right corner.
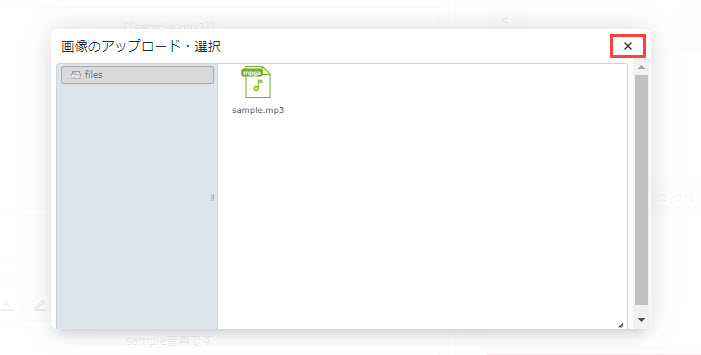
Click "Save" to return to the "Insert/Edit Image" screen.
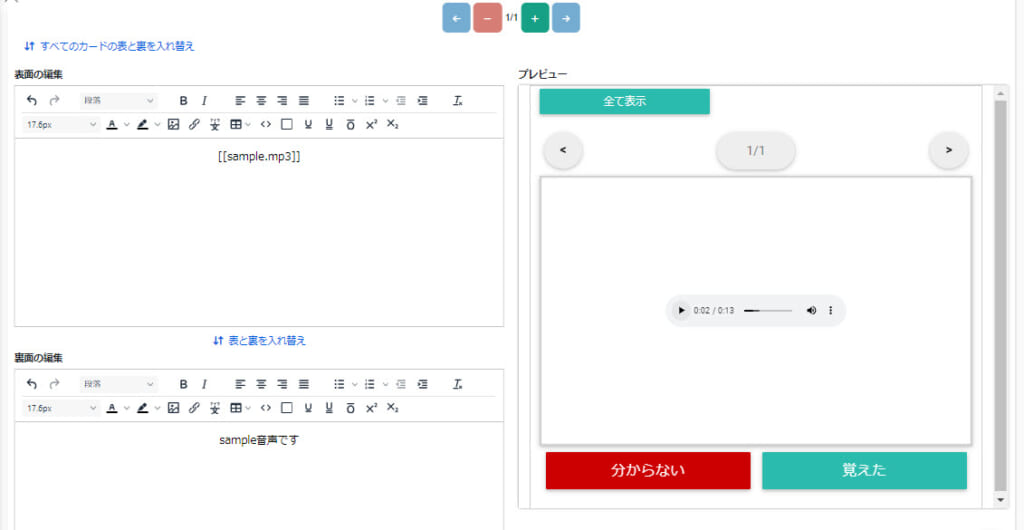
Then enter the file name and extension in the input fields and enclose them in [[ ]].
*In the following example, [[sample.mp3]]
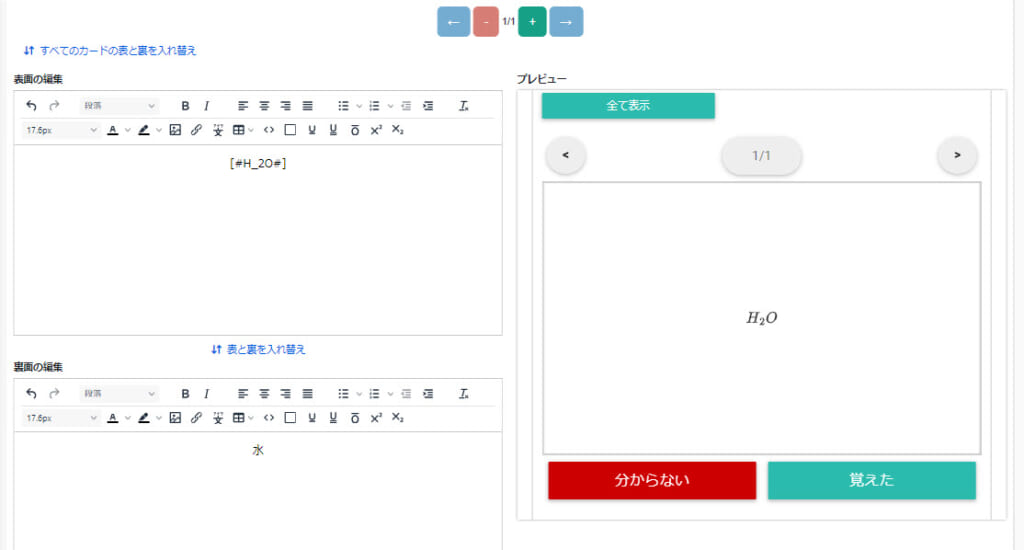
▼ Chemical Formula
Enter a formula in Tex format between [# and #].
Refer to Tex verification tool for QuizGenerator.
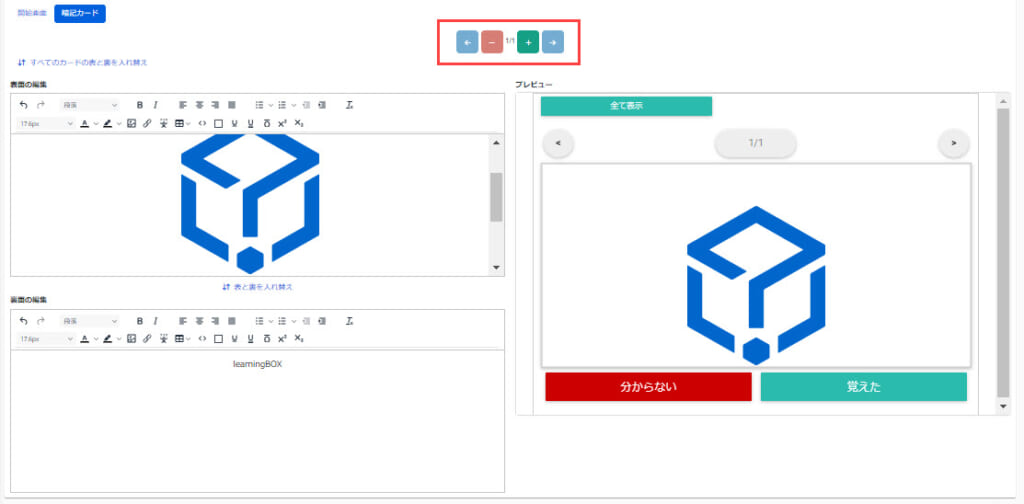
04. Add/Remove cards
Click the "+" icon to add a card or the "-" icon to remove a card.
You can also use the "←" and "→" icons to move cards you have created.
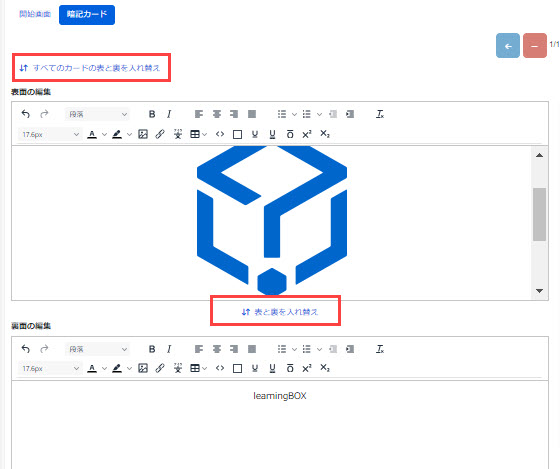
05. Front and back replacement
The front and back sides of the created cards can be interchanged.
- Swap the front and back of all cards: all cards are eligible
- Swap the front and back: the card currently being edited is the target card.
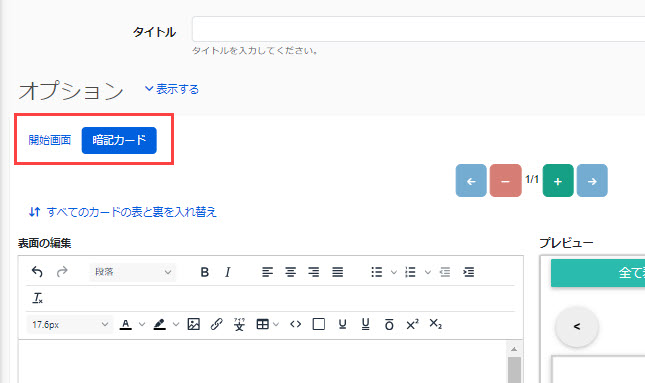
06. Switching between start and edit screens
Each time you click on "Start Screen/Memorize Card," you can switch between the start screen and the edit screen.
Types of the save button:
Save and Publish: Publish to assigned users as soon as it is saved.
Save as Private: The content is saved, but it becomes private and is not shown to the user.
Create memorization card with text/Excel
Memorization cards can be created in text and uploaded to learningBOX.
This will help you to create Memorization cards in bulk.
▼ Steps
STEP1: Enter text shown on the memorization card.
STEP2: Click the "Tab" key on the keyboard.
STEP 3: Enter text shown on the backside of the memorization card.
Repeat the steps above.
*For more details, refer to How to create memorization cards.
AI Assist
AI assists you to create memorization cards.
*For more details, refer to AI Assist - Memorization Card.
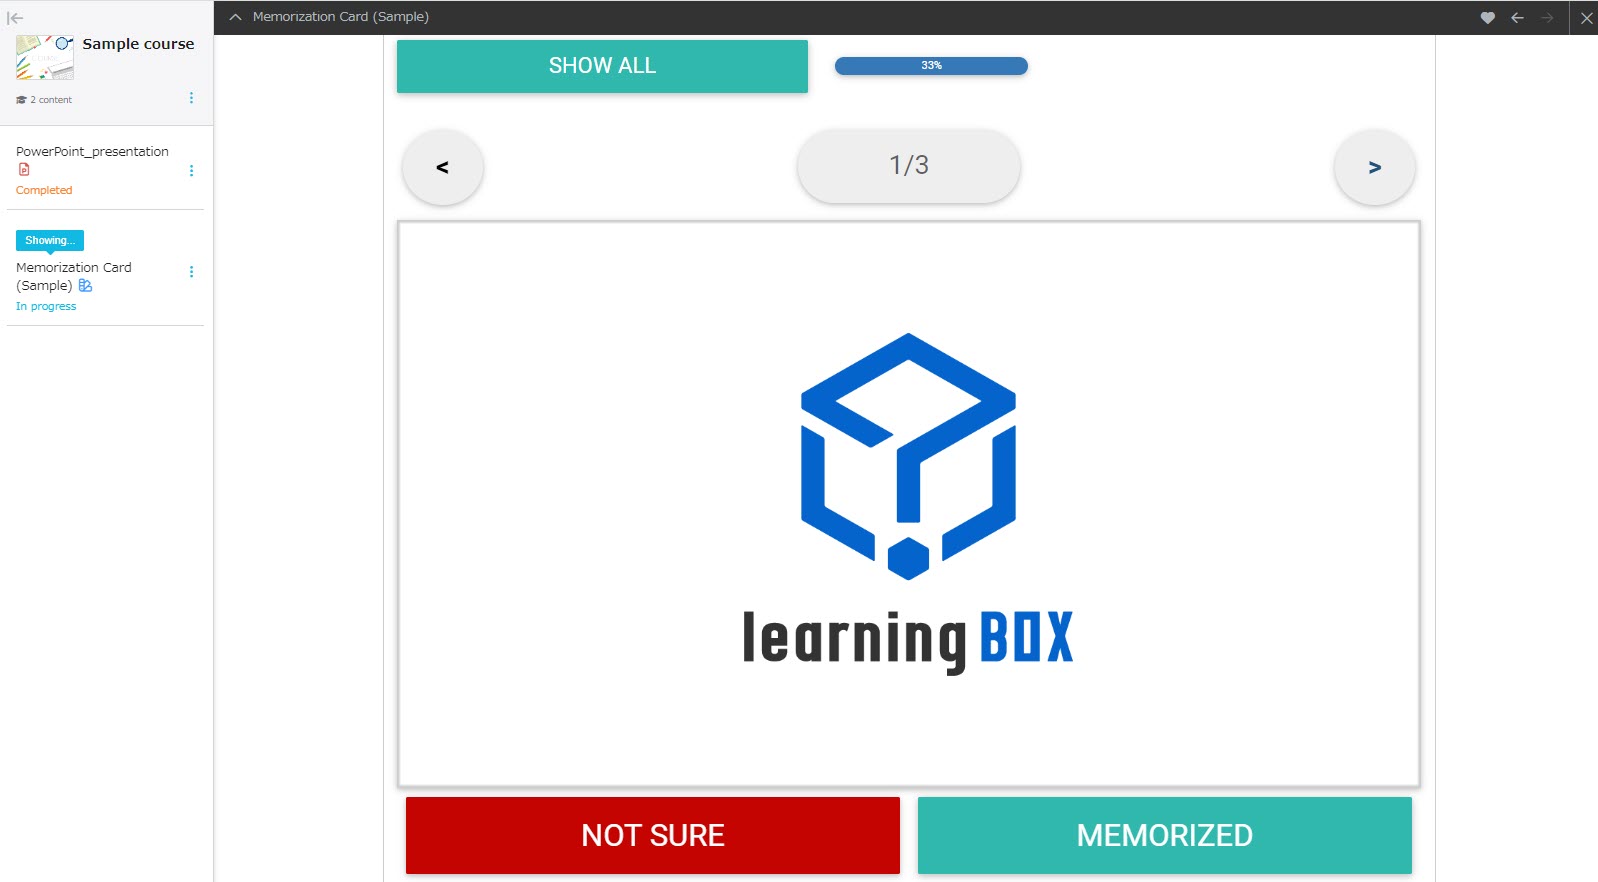
User interface
Learners can:
1. Swipe to move to the next/previous page.
2. Tap to check the backside of the card.
3. Select a status from SHOW ALL/NOT SURE/ MEMORIZED/NOT ANSWERED.
Edit Memorization Card
01.Upload
Click on the course you have created.
Click on the "+" icon > Content > Memorization card > Upload memorization card
02. Re-upload
Right-click on the target memorization card or select the gear icon > "Re-upload".
You can overwrite the Memorization card by re-uploading.
03. Download
Right-click on the memorization card or select the gear icon > Download
It will be downloaded in a zip file, which contains all the question and image files.
04. Editing
Right-click on the memorandum card or select the gear icon > Edit
The items to be edited are the same as when creating a new item,Creating memorandum cards.".
Learning progress
When a learner clicks "MEMORIZED," 100% will be divided by the number of clicks and shown as the learning progress.
For example, when the learner clicks "MEMORIZED" for one card out of three, the learning progress will be 33%.