Dashboard
This page explains how to select panels to display on the Dashboard.
Interface
Depending on the roles, displayed buttons will be different.
*For more details, refer to Management roles .
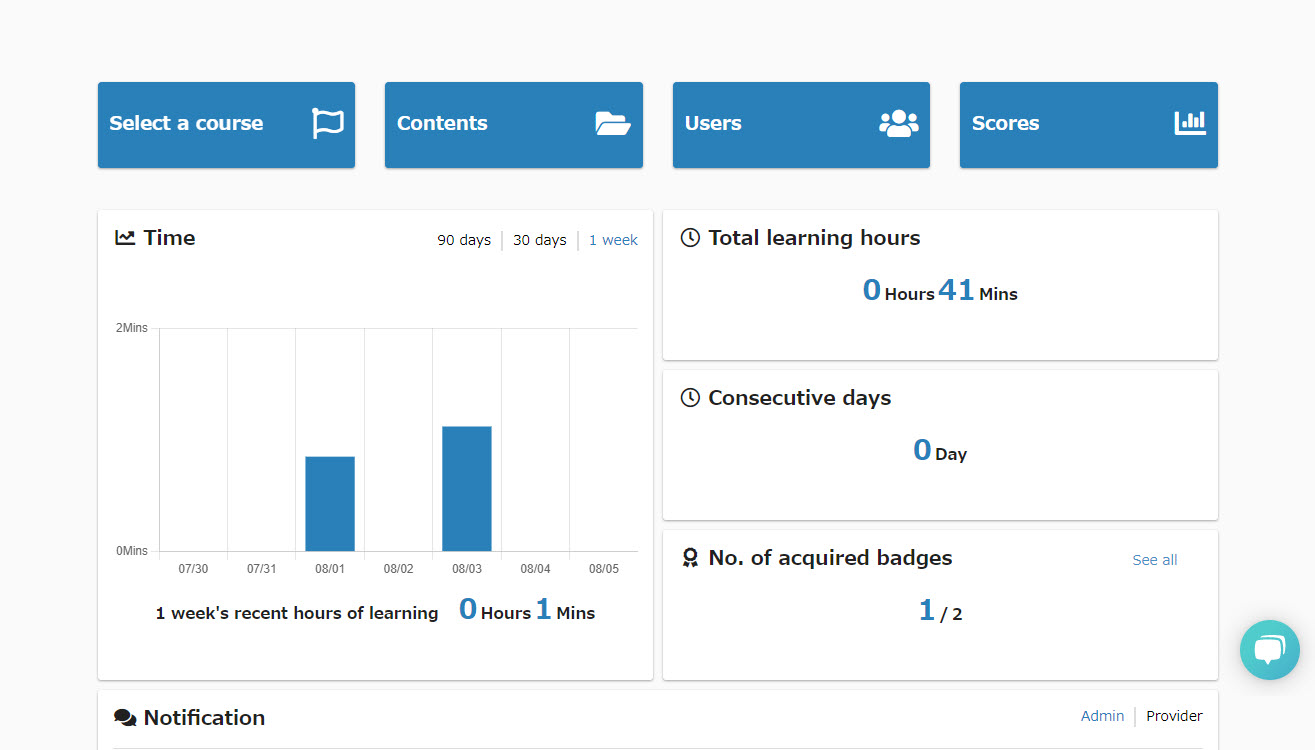
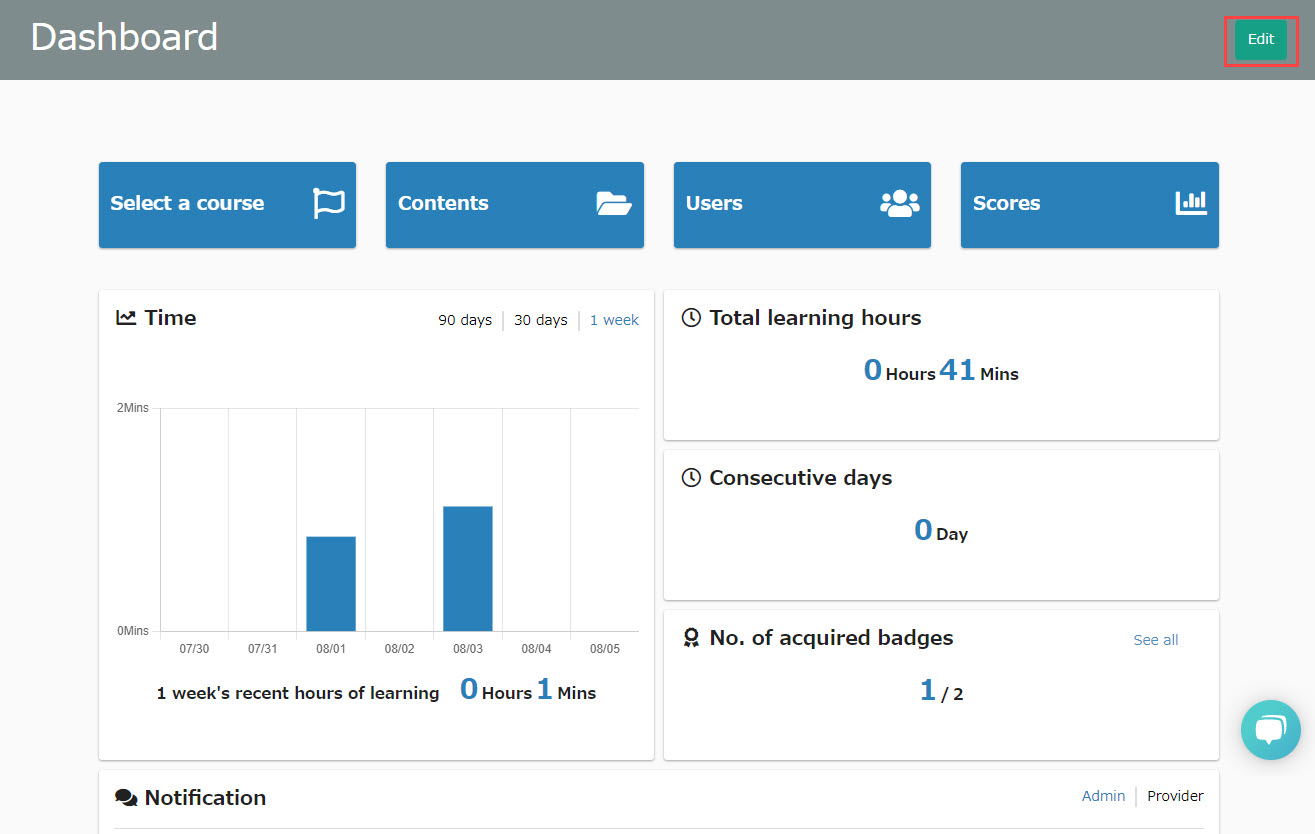
01. Admin
All panels will be shown.
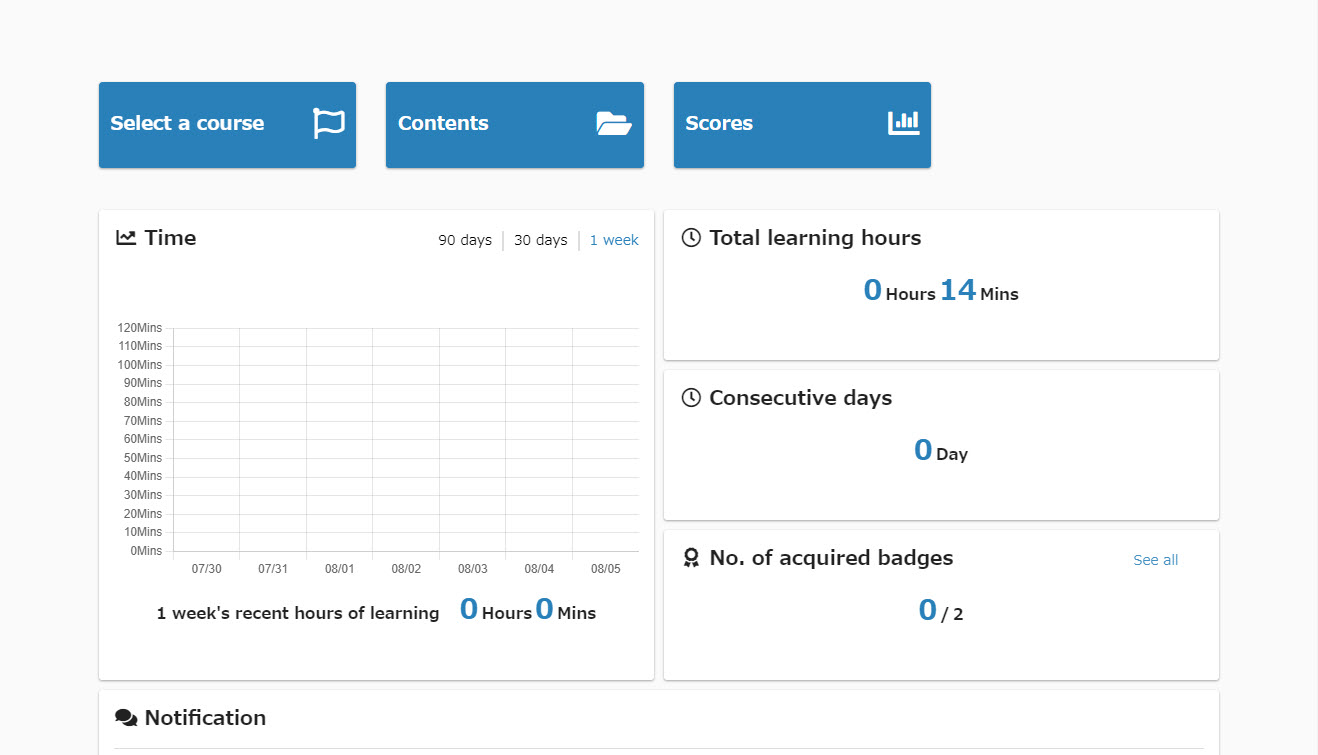
02. Users assigned role(s)
Each button will be shown depending on the roles.
e.g.) "Contents" will be shown when you are a Content manager.
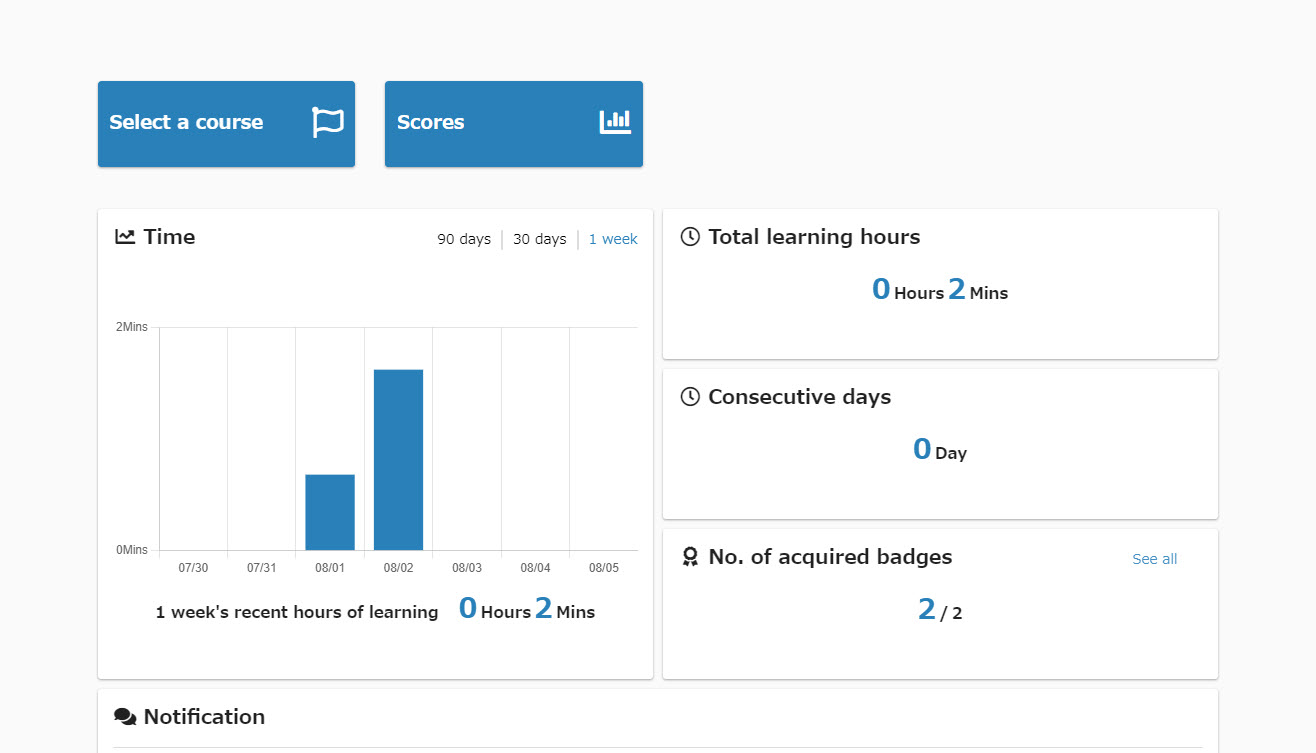
03. Users with no roles
Only "Select a course" and "Scores" will be shown.
Settings
Required
Management role: Co-admin
*When finish editing, click "Save" in the upper right corner of the page.
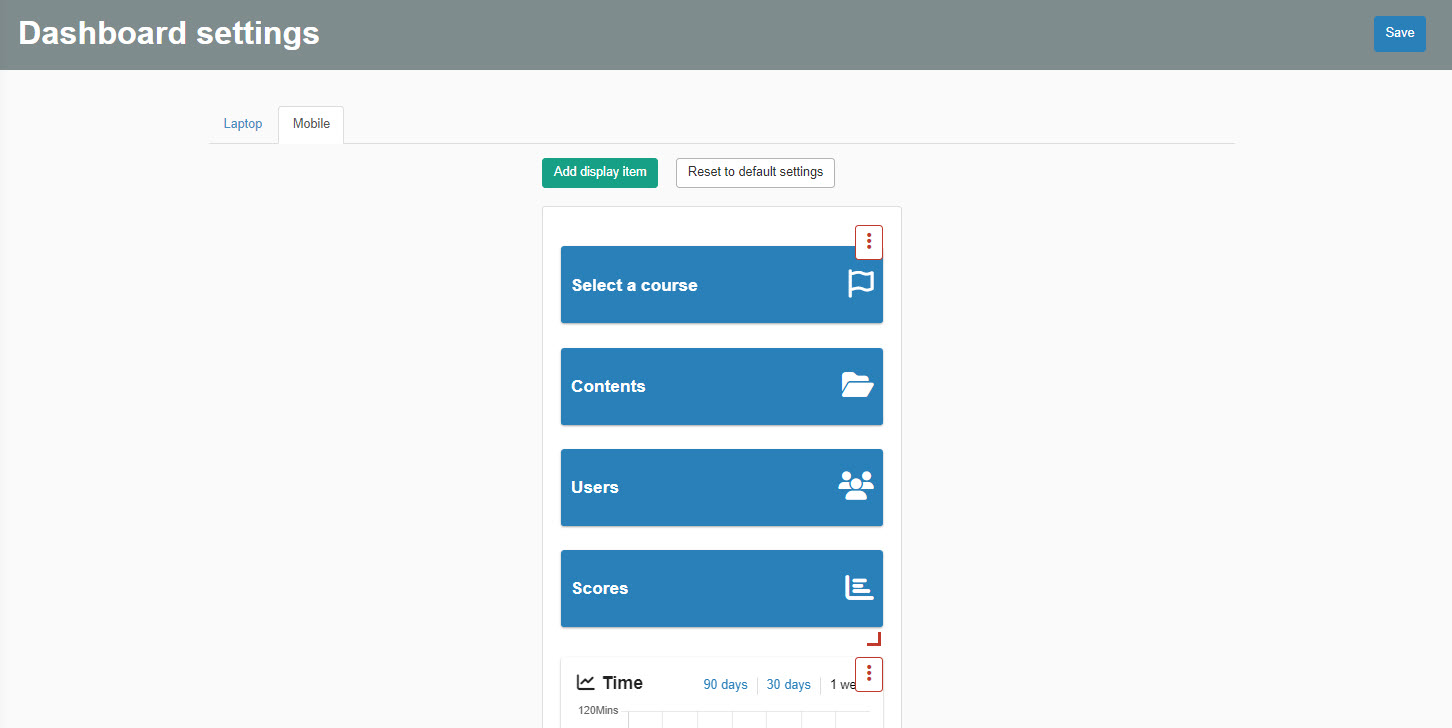
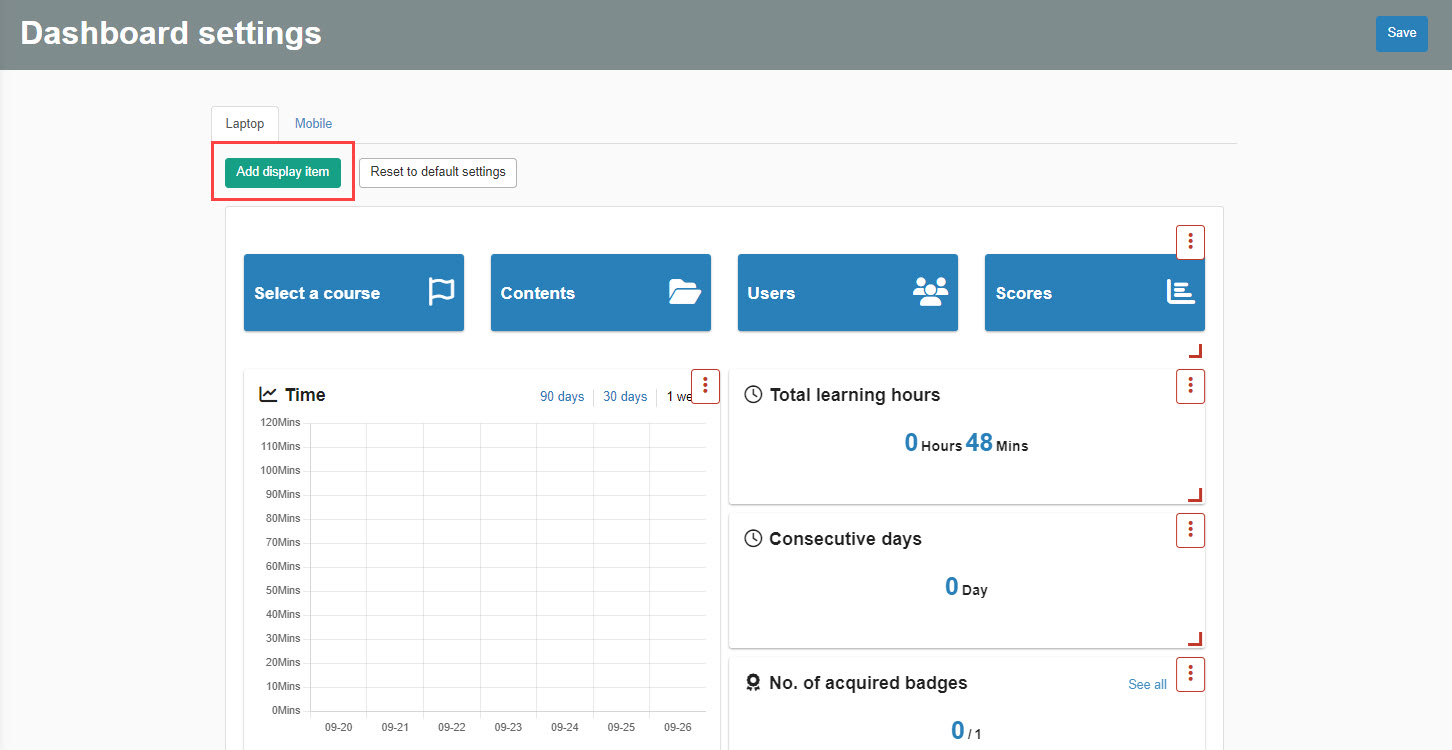
01. Dashboard settings
Click on "Edit."
02. Add items to display
Click on the green button in the red square.
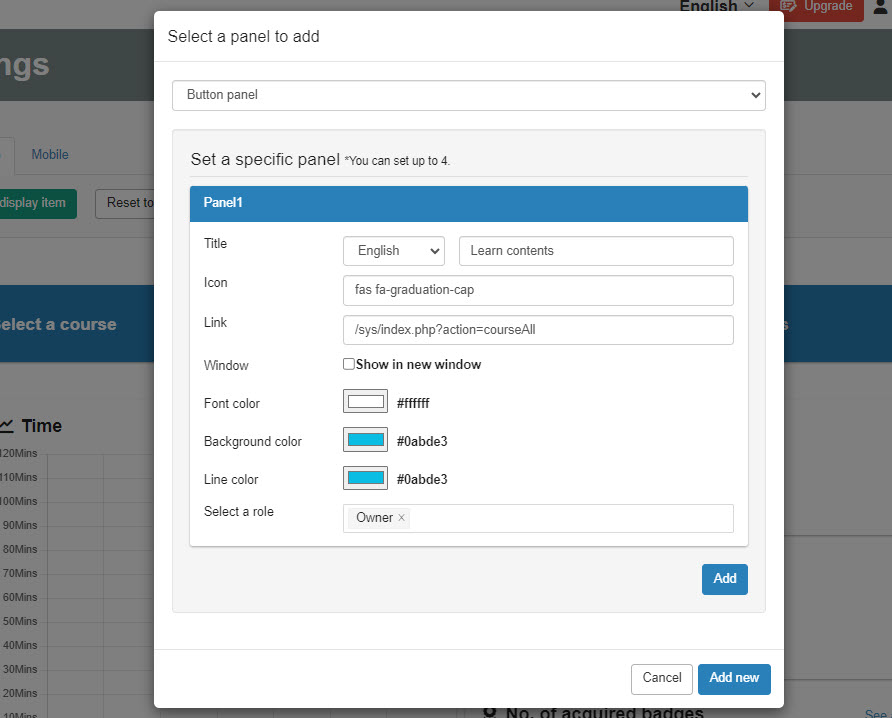
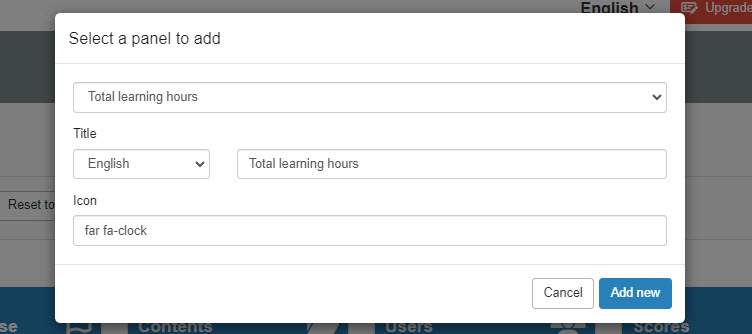
03. Select panels
Select panels to add on the dashboard.
Click "Add new."
Items will be different depending on your contract.
[New curriculum/New training]
Contract with Shared server + Customization are required.
[New product/New seminar]
EC special license is required.
Panel settings
01. Button panel
-Titles, icons, URLs, text color and more options can be customized.
-Select users to show each panel.
-Click "Add" to add a new panel.
*Up to four panels can be added.
02. Total learning hours, consecutive learning days, expiry date, No. of badges acquired, schedule
Panel titles and icons can be set.
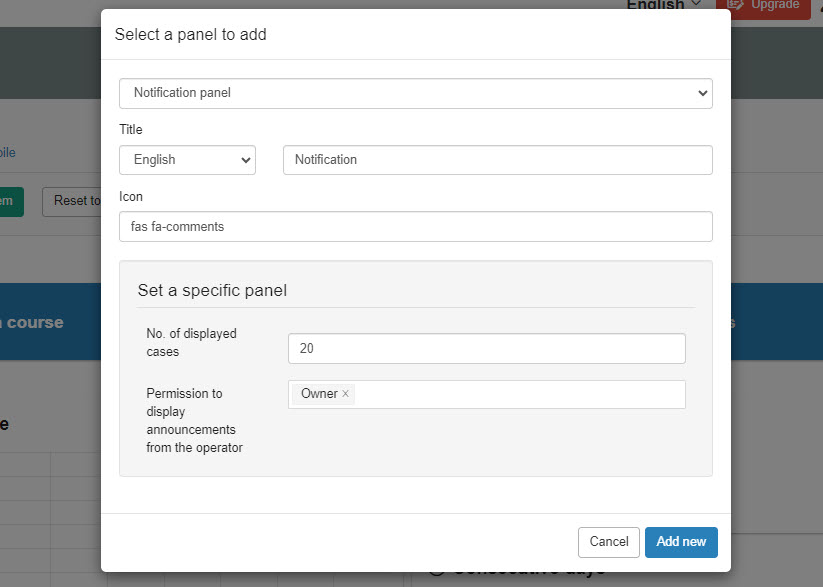
03. Notification panel
Title, icon and No. of displayed cases can be set.
Also, notifications from learningBOX provider can be shown depending on the user settings you specify.
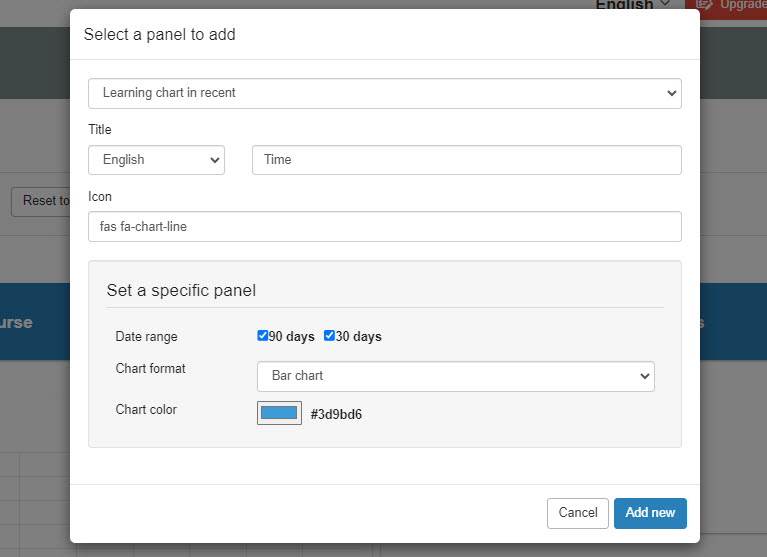
04. Time
You can set a title and icon, and specify the duration to display on the graph.
The graph format and color are selectable.
*When "Line chart" is selected, boldness of the line and dots, colors can be specified.
05.Courses
The following items can be set.

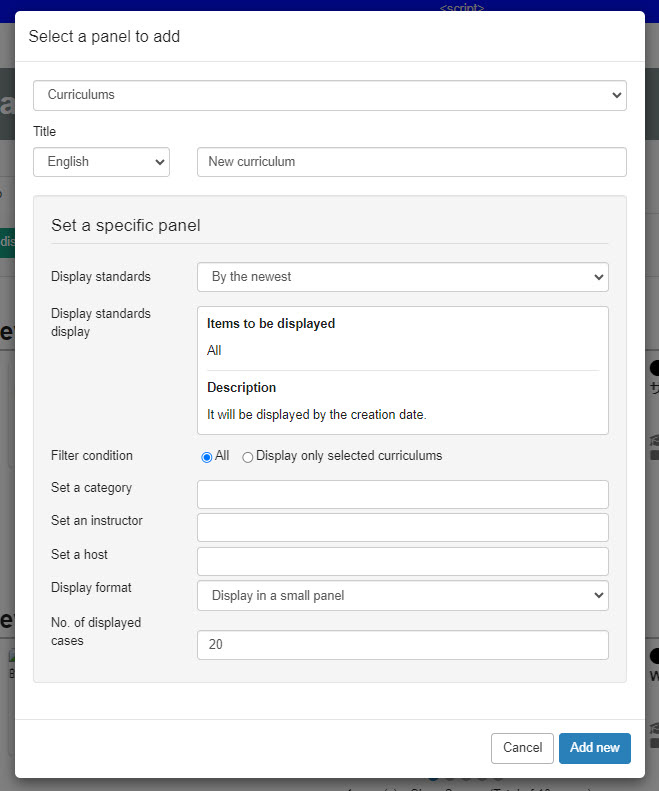
06. Curricula
The following items can be set.
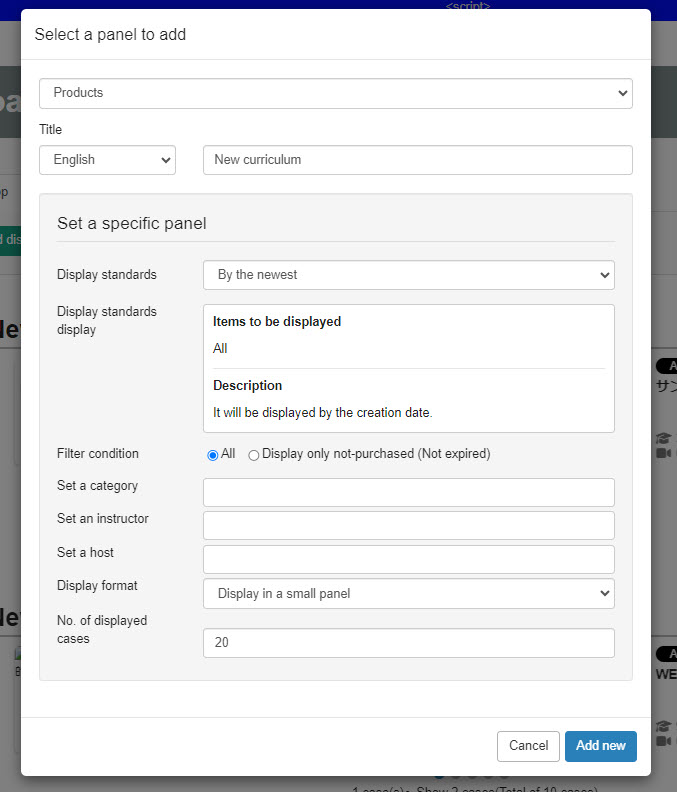
07. Products/Seminars
The following items can be set.
How to edit a panel
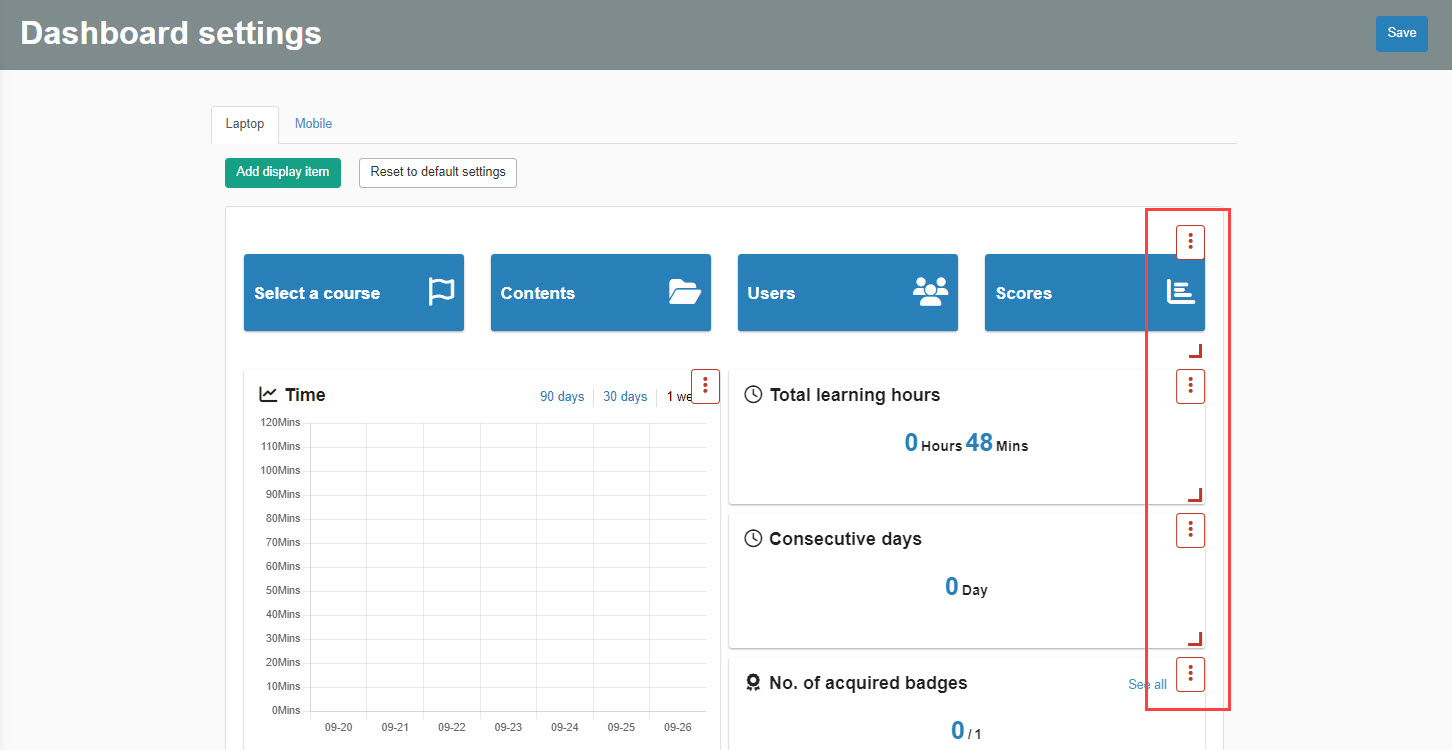
01. Edit panel
Click on the "︙" icon to edit, duplicate or delete.
02. Check the page on smartphone
Click on the "Mobile" tab.
Customize the layout and size of panels for smartphones.