Email settings by admin operation
This section explains the email settings by admin operation.
Invitation email notification
Users are notified when they are registered.
01. Settings
Select if you use this notification or not.
To use this notification, turn on the toggle key.

02. Edit template
You can create a new email template or edit an existing one.

▼Create new template
1. Click the "+" icon.
*You can access to the same page by clicking the list icon > Create new
You can edit the template on the left side of the page, and preview on the right.
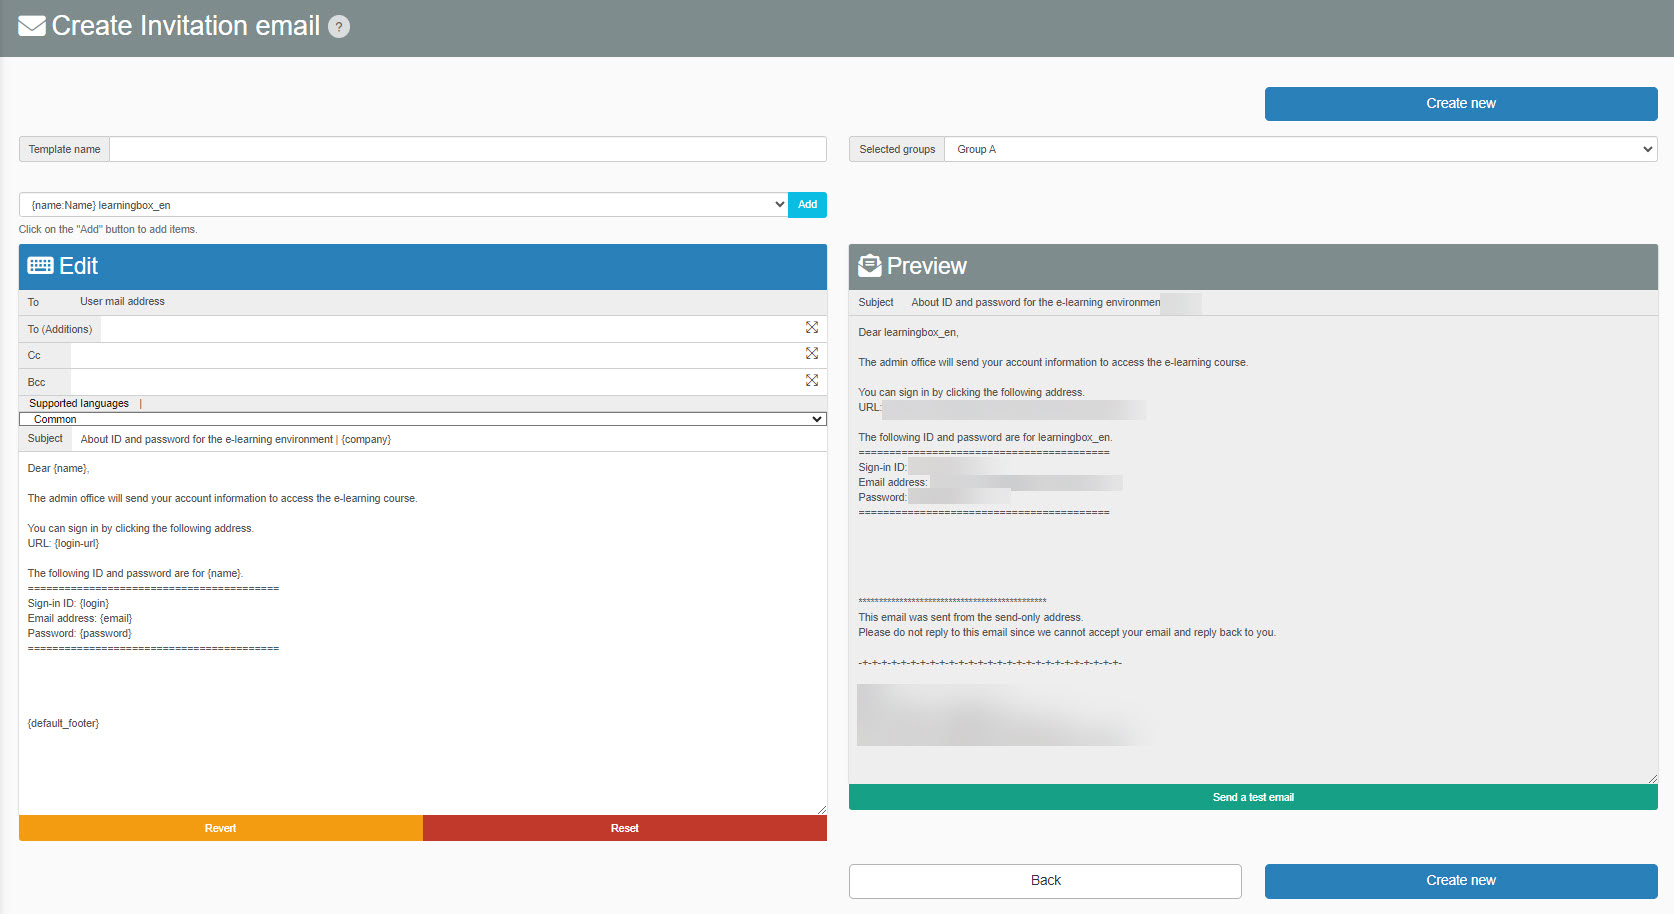
2. Enter a template name and select a group to use this template when sending an invitation email notification.

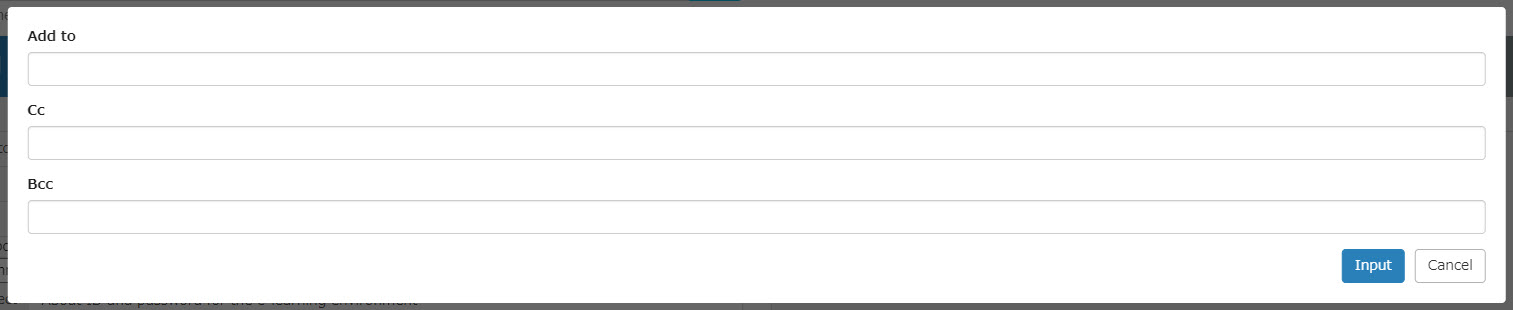
3. To add an e-mail address, click the icon to the right of the address field.

Enter a recipient.
4. Select which language settings to apply.
The list will be shown by clicking the "Common."

This "supported language" is linked to each user's language settings on the Manage users page.
*For more details, refer to User registration.
- When users' language is not selected, or not Japanese nor English: The "Common" template will be applied.
- When users' language is Japanese: The "Japanese" template will be applied.
- When users' language is English: The "English" template will be applied.
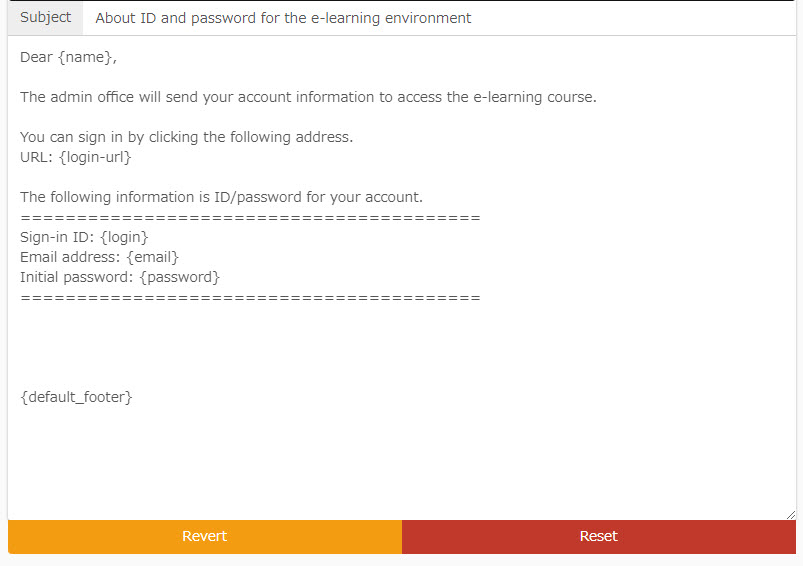
5. Enter the subject and body.
You can revert or reset the edited content of the notification.
To add an item, select the item from the list at the top and click "Add."

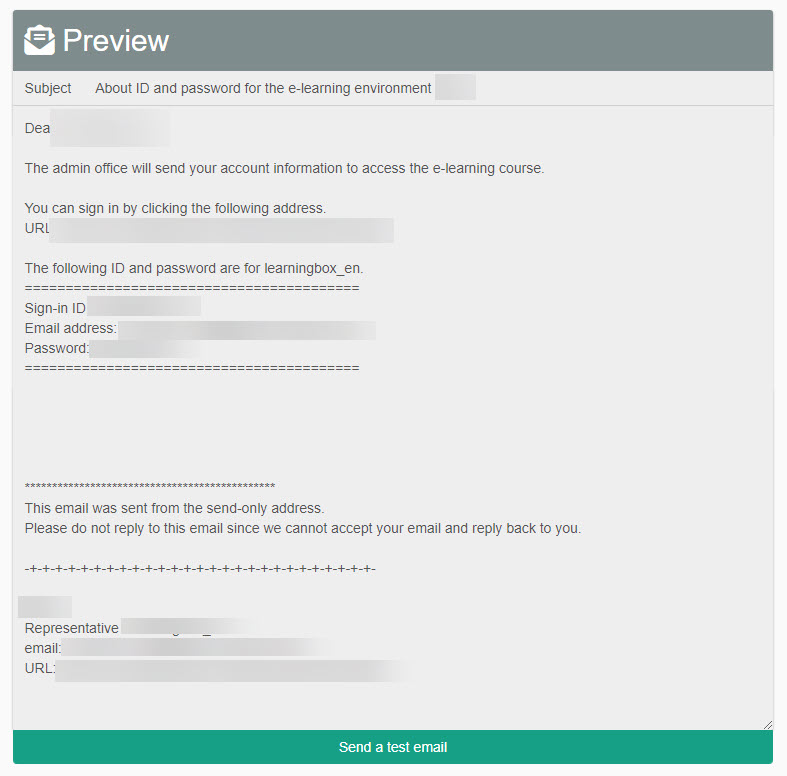
6. The preview shows you the name of a user as an example.
To send a test email, click on "Send a test email."
The test email will be sent to the admin.
When all settings are completed, click "Create new."
▼ Edit
1. Click on the list icon to go to the Email templates.
Click on the pencil icon to edit.
To delete a template, click on the trash can icon.

Refer to the step 2 to find how to edit a template.
When all settings are complete, click "Save."
Scoring result notification
You can choose whether or not to notify users when their submissions have been graded.
01. Settings
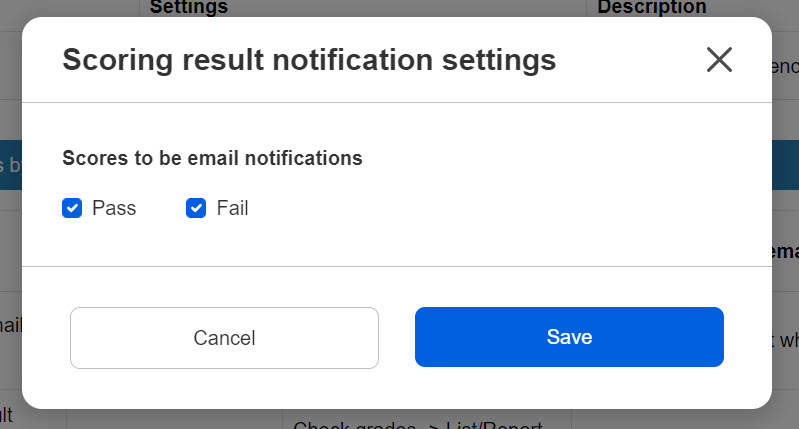
Click on "Advanced settings."

The following window will be shown.
A notificaiton will be sent to users when their status meets the condition.
When you do not tick either box, users will not receive the notification.
Grading workflow: The "Approval after grading" can be set.
In that case, notifications will be sent to users when the process is completed.
02. Edit template
You can edit the email template for the scoring results notification.

▼ Edit
1. Click on the list icon to go to the Email templates page.
Click on the pencil icon.
To restore the edited template to the default, click on the vortex icon.

2. Refer to Invitation email notification to find the operation.
When all settings are completed, click "Create new."
Manage grades notification
Notifications regarding grades can be sent to users at the preferred date and time.
*For more details on the email notification, refer to List of grades.
01. Edit template
You can create a new email template for the Manage grades notifications or edit an existing one.

▼Create new template
1. Click the "+" icon.
*You can access to the same page by clicking the list icon > Create new
Refer to Invitation email notification to find the operation.
In addition to the "Invitation email notification," follow the steps below.
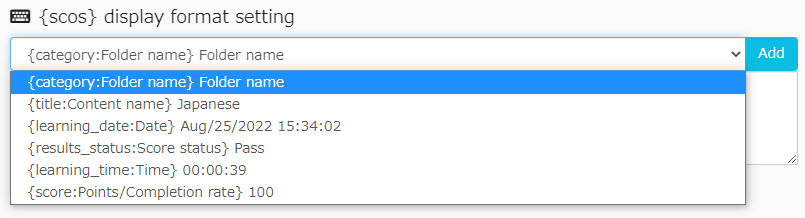
2. Folder name, content name, grade information including scores can be added.
Under the {SCOS} display format settings at the bottom of the page, select an item from the list and click "Add."
When all settings are completed, click "Create new."
▼ Edit
1. Click on the list icon to go to the template page.
Click on the pencil icon to edit.
To delete a template, click on the trash can icon.

Refer to the step 2 to find how to edit a template.
When all settings are complete, click "Save."
Notification
The publication of notification can be notified to users.
*For more details on notifications, refer to Manage notifications.
01. Edit template
You can edit the email template for notification notifications.

▼ Edit
1. Click on the list icon to go to the template page.
Click on the pencil icon.
To restore the edited template to the default, click on the vortex icon.

2. Refer to Invitation email notification to find the operation.
*You can set whether or not to display the title of the notification in the "Subject."
The subject is set to be displayed as default.
When all settings are completed, click "Create new."
Notification of rejection of submission
You can choose whether or not to notify users when content using the grading workflow is rejected during the "Approval before grading" step.
*For more details on the grading workflow, refer to Grading status.
01. Settings
To use this notification, turn on the toggle key.

02. Edit template
You can edit the template of Notification of rejection of submission.

▼ Edit
1. Click on the list icon to go to the template page.
Click on the pencil icon.
To restore the edited template to the default, click on the vortex icon.

2. Refer to Invitation email notification to find the operation.
When all settings are completed, click "Create new."
Report grading request notification
When there are report assignments waiting for grading, a notification can be sent to Grade managers to request grading.
*For more details on the email notification, refer to Email notification.
01. Edit template
You can edit the template of Report grading request notification.

▼ Edit
1. Click on the list icon to go to the template page.
Click on the pencil icon.
To restore the edited template to the default, click on the vortex icon.

2. Refer to Invitation email notification to find the operation.
When all settings are completed, click "Create new."
Third-party evaluation notification
Learners will be notified when a third-party evaluation is conducted on their performance on the personality test.
*For more details, refer to Third-party evaluation (Personality test).
01. Edit template
You can edit the email template for the notification of third-party evaluation (Personality test).

▼ Edit
1. Click the icon in the list to go to the template.
Click on the pencil icon.
To restore the edited template to the default, click on the vortex icon.

2. Refer to Invitation email notification to find the operation.
When all settings are completed, click "Create new."