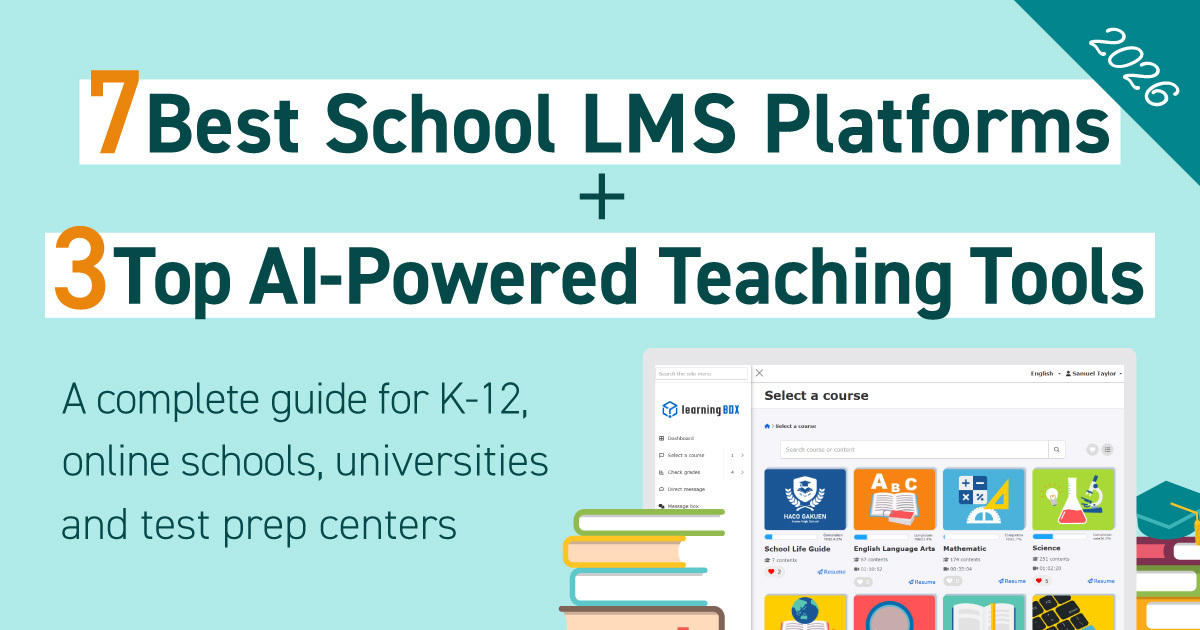
[2026] 7 Recommended School LMS Platforms + 3 AI Learning Tools
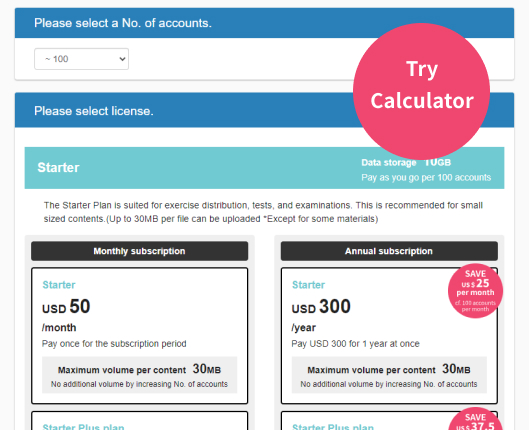
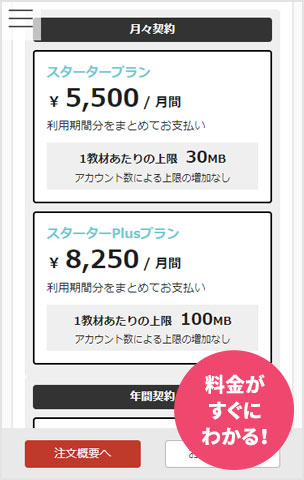
What Is an LMS for Schools? An LMS for schools is a learning management system that centralizes the distribution of instructional materials, course enrollment management, and grade management, while providing visibility into students’ learning progress. Google Classroom is a popular choice for elementary, middle, and high schools; manaba is widely used at universities; and learningBOX is a leading option for a wide range of school types and cram schools. With the promotion of the GIGA School Initiative, schools have established an environment where every student has their own device, and the focus of ICT utilization is shifting from “infrastructure development” to “improving the quality of use.” In NEXT GIGA (Phase 2 of the GIGA School Initiative), in addition to the planned replacement of devices, accelerating educational digital transformation (DX) to realize “personalized learning” and “collaborative learning” has become a key focus. Amid this trend, there is growing interest in LMS (Learning Management Systems), which enable centralized management of instructional material distribution, assignment tracking, and the visualization of student progress. However, with so many services available in the LMS market, it is not uncommon for administrators to feel uncertain about questions such as “Which LMS best meets our school’s requirements?” and “What is the difference between AI-powered instructional materials and an LMS?” In this article, we compare and explain seven recommended LMS options and three AI-powered learning materials, tailored to each educational level—from elementary, middle, and high schools to correspondence high schools, universities, vocational schools, and cram schools. We clearly outline the key points for selecting the system best suited for your institution, while organizing the features and differences of each option. *This article summarizes the features of each service from a neutral standpoint, based on publicly available information. Check out real-world use cases in educational settings now. Download the Guide for Schools and Tutoring Centers. What Is an LMS for Schools? Differences from Enterprise LMSs LMSs used in schools share common functions with enterprise LMSs, such as content delivery, learning history management, and test administration. However, a key distinguishing feature is the need for functions that address school-specific needs, such as continuously monitoring students’ learning progress, collaborating with parents, and integrating with school administration systems. In this chapter, we’ll examine the basic functions of an LMS, the specific requirements for school-based LMSs, and how they differ from corporate LMSs. Basic Functions of an LMS (Learning Management System) An LMS (Learning Management System) is a system that centralizes the delivery of learning content, course management, and grade management. Main Functions: Educational Materials and Content Management—Registration and distribution of videos, text, PDFs, etc.; Course Management—Real-time tracking of course status, progress, and completion rates; Tests—Administration and automatic grading of quizzes, regular exams, and surveys; Assessment— Visualizing individual learners’ strengths and weaknesses, and optimizing learning paths; Grade Management: Recording and analyzing scores and proficiency levels; Communication: Message boards, private messages, and assignment submissions. By combining these functions, it becomes possible to drive the “Plan → Implement → Evaluate → Improve” cycle. As a result, educators can more easily visualize the learning status of each individual student, making it simpler to provide detailed guidance and follow-up support. An LMS can be considered the foundational system for effectively operating e-learning. Specific Requirements for School-Based LMSs Unlike corporate LMSs, school-based LMSs must include features tailored to the school system and the operational realities of the classroom. Functions such as attendance tracking, grade management, assignment submission, and the accumulation of learning histories are particularly important because they are directly linked not only to daily instruction but also to academic evaluation and credit recognition. In elementary, middle, and high schools, key comparison points include intuitive usability that allows students to navigate the system without confusion, features for sharing information with parents, support for multiple-criteria assessment, and ease of updating accounts as students advance to the next grade or move on to higher education. For correspondence high schools, it is crucial that the system can properly manage attendance during on-campus sessions, handle report submissions and feedback, and effectively manage the workflow leading up to credit certification. Furthermore, it is important to verify that the system works smoothly on devices such as Chromebooks and iPads provided under the GIGA School Initiative, as well as its ability to integrate with external systems like learning e-portals. Since these systems handle student grades and learning histories, it is essential to select an LMS that aligns with your school’s policies and operations, including security measures and compliance with personal information protection regulations. Differences from Enterprise LMS [Comparison Table] We have organized the differences between school-oriented LMS and enterprise LMS by major categories in the table below. Comparison Criteria School LMS Corporate LMS Purpose Classroom support, tracking learning progress, grading, and promoting independent study Employee training, compliance training, and skill development (certification preparation) Target Audience Children, students, faculty and staff, parents New hires, general employees, managers, HR personnel Required Features (Features beyond common functions) Grading, assignment submission, parent communication, attendance management, accounts organized by class or grade level, academic year renewal management; Batch management of course participation status, training surveys, saving and exporting participation logs (for auditing and compliance purposes) Security Requirements: Compliance with MEXT guidelines (*1); protection of personal information; compliance with internal security policies; measures to prevent leakage of confidential information. Support System: Japanese language support and Support for educational institutions is mandatory; in some cases, support designed for multilingual capabilities and global expansion is required. Pricing Structure: School-wide flat-rate plan, or academic pricing based on student enrollment; pay-as-you-go based on the number of active accounts, or fixed monthly/annual fees. *1 Ministry of Education, Culture, Sports, Science and Technology (MEXT), “Guidelines on Educational Information Security Policy” Differences Between LMS and “AI-Based and Digital Learning Materials” LMS and AI-based and digital learning materials differ in their purposes and roles. An LMS serves as a “learning management platform” for managing the distribution of learning materials, learning histories, test results, and more. On the other hand, AI-based and digital learning materials constitute the “learning content” that students actually use for their studies. In some cases, an LMS may not come with pre-loaded learning exercises, so teachers create their own materials or import external resources to use with the system. AI-powered learning materials, on the other hand, are characterized by their ability to analyze students’ understanding and areas of difficulty, and to provide exercises tailored to each individual student. In schools, it is becoming increasingly common to use both systems in tandem: the LMS manages the overall learning process, while AI-powered and digital learning materials support daily learning activities. The Difference Between an LMS and a “School Administration System” A system often confused with an LMS is the “school administration system.” While an LMS manages students’ learning activities, a school administration support system is designed to streamline the main administrative tasks of faculty and staff outside of class, such as attendance tracking, report card generation, and the creation of teaching records. However, adoption rates vary by school level. While implementation in elementary and middle schools is often led by local governments, some high schools have not yet adopted such systems, and others use systems customized to fit their specific curricula and operational needs. Therefore, when implementing an LMS, it is important to confirm in advance whether your school has a school administration support system and whether data integration with the LMS is possible. It is necessary to design an appropriate operational framework based on the extent to which learning histories and grade data can be linked and utilized. Return to Table of Contents How to Choose an LMS for Schools | 6 Comparison Points To implement the LMS best suited for your school, it is important to compare options from multiple angles—including not only features but also operational aspects and future scalability. Here, we explain six key points you should pay particular attention to. 1. Suitability for School Type When selecting an LMS, it is important to confirm that it is suitable for your school’s type. The required features and ease of use differ between elementary, middle, and high schools; correspondence high schools; universities; vocational schools; and cram schools or preparatory schools. In particular, under the NEXT GIGA initiative, there is a strong emphasis on establishing an LMS as a digital transformation (DX) platform for education that leverages learning data, in line with the rollout of one device per student. For elementary and middle schools, a key comparison point is whether the LMS runs smoothly on GIGA School devices such as Chromebooks, iPads, and Windows devices already in use. In elementary schools, the system must be intuitive enough for even lower-grade students to use without confusion and must support hiragana and ruby text. On the other hand, for universities and vocational schools, managing thousands of users and integration with course registration systems are critical. When used in tutoring centers or cram schools, LMS platforms equipped with online textbook sales and payment processing capabilities should also be considered. It is important to compare options after considering the usage scenarios for each school type and identifying the necessary features. 2. Ease of Creating Learning Materials To ensure an LMS becomes firmly established in the classroom, it is important not to increase the workload on teachers. In schools without a dedicated IT staff member, the system must be intuitive enough to allow teachers to create and edit learning materials and tests even without specialized knowledge. In addition, it is advisable to check the following points: Support for a variety of question formats, such as essay questions, fill-in-the-blank, and reordering; Easy uploading of PDFs, videos, and audio files; Reuse of existing teaching materials and template functions; AI-powered question-generation support. The key to sustained use lies in whether the system can be used seamlessly as an extension of daily work without causing undue strain. 3. Pricing and Fee Structure Since school budgets are limited, pricing and fee structures are also important factors to compare. Check for free plans or trial periods, and start by testing the system with a small group to see if it works. Also, if the pricing is based on the number of accounts, it’s important to calculate in advance the monthly or annual costs for all students and staff. Comparing not only the initial costs but also the operating costs over several years will help you better understand the financial burden after implementation. 4. Support System Immediately after LMS implementation or during the new school year when classes are being reorganized, questions about how to use the system and technical issues are likely to arise. Therefore, the quality of the support system is also a key comparison point. Make sure there is a Japanese-language support channel—such as phone, email, or chat—that fits your school’s operational needs. It’s also reassuring to check whether the system provides manuals and FAQs that teachers can consult on their own, as well as operational support during the implementation phase. Additionally, you’ll want to verify whether the vendor has a proven track record of successful implementations and support for educational institutions. School-based LMSs face unique challenges distinct from corporate LMSs, such as grade-level updates, class reorganization, parent communication, and operation on GIGA School devices. Choosing a vendor with implementation and usage case studies for the same type of school as yours will help minimize post-implementation issues and operational burdens. 5. Security and Certification Status Since LMSs handle students’ grades, learning histories, and personal information, verifying security measures is essential. Verify that the system has mechanisms in place to ensure secure operation, such as communication encryption (TLS), access rights management, and permission settings tailored to administrators, teachers, and students. Additionally, the service provider’s security management framework is crucial. Checking whether the provider has obtained ISO 27001 (ISO/IEC 27001) certification makes it easier to determine if the organization is implementing appropriate security management. For overseas products, it is also advisable to check for SOC 2 certification. 6. Integration with Core Systems Integration with existing systems is also important. If single sign-on (SSO) supporting SAML or SCIM is available, it can reduce the burden of login and account management. Furthermore, if user information and grade data can be synchronized with school administration and academic management systems via API integration, it becomes easier to prevent manual data entry and duplicate record-keeping. When comparing LMS platforms, it is important to conduct a comprehensive evaluation that goes beyond just features—consider whether the system can be operated in accordance with the Ministry of Education, Culture, Sports, Science and Technology’s “Guidelines on Educational Information Security Policy,” its status regarding information security certifications, and its interoperability with existing systems. Click here for ideas on how to use it in educational settings. Download the User Guide for Schools and Tutoring Centers. Return to Table of Contents. [Comparison Table] 7 Selected LMS and Learning Platforms for Schools. Below, we will compare seven LMS and learning platforms with a proven track record of implementation in schools, focusing on their features, pricing, and supported school types. Comparison Table List Service Name Provider Pricing Supported School Types Key Features learningBOX learningBOX Co., Ltd. Starting at 5,500 yen/month for 100 users (free plan available) Elementary, middle, and high schools; correspondence high schools; universities; vocational schools; cram schools A Japanese-developed LMS. Proven track record of implementation in educational institutions; supports IBT, CBT, and test preparation for professional certifications. Easy to start on a small scale. Google Classroom Google Free (Education Edition) Elementary, middle, high school, and university Integrates with Google Workspace. A standard tool for the GIGA School initiative. Microsoft Teams for Education Microsoft Free (A1 Plan, etc.) Elementary, middle, high school, university Integrates with Office 365. Standard GIGA School tool for Windows devices. Moodle Moodle HQ, etc. Free (open source) *Setup fees not included High school, university, vocational schools Global standard open-source LMS. Highly customizable. manaba Asahi Net Co., Ltd. Contact for details Universities Among the top in adoption rates at Japanese universities. Strength in report management. Canvas LMS Instructure Contact for details High schools and universities Dominant market share at universities overseas. Sophisticated, modern UI. Blackboard (formerly Anthology) – Contact for details. Universities and vocational colleges: Designed for large-scale higher education institutions. Robust and multifunctional platform. 1. learningBOX learningBOX is a Japanese-developed LMS that balances ease of use with affordable implementation and ongoing costs. A key feature is its intuitive operation, which requires no specialized knowledge, and the ease with which users can create learning materials and tests. It offers a free trial for up to 10 accounts, and even for full-scale implementation, pricing starts at 5,500 yen per month (tax included) for 100 accounts, making it ideal for educational institutions looking to implement an LMS on a limited budget. It is a highly versatile platform capable of supporting a wide range of learning environments, from elementary, junior high, and high schools to correspondence high schools, universities, and vocational schools, as well as private tutoring centers and corporate training programs. Its main features are as follows. Cost: A free trial is available for up to 10 accounts, and full implementation starts at 5,500 yen (tax included) per month for 100 accounts. Extensive course material creation features: In addition to creating quizzes and tests with 14 different question formats, the platform supports videos, PDFs, and SCORM-compliant course materials. Grade and Course Management Features: You can review course progress and grades in detail, and issue certificates of completion to students who meet specific criteria. Integration with Core Systems: Streamline operations by synchronizing grades and user data, and utilizing single sign-on via SAML or SCIM. ■ Recommended for Schools: Schools looking to reduce the burden of course material creation on teachers in the classroom / Schools that want to utilize an LMS while keeping implementation and operational costs as low as possible ■ learningBOX Official Website: Check out learningBOX’s features and use cases in our materials. Download the learningBOX service brochure. 2. Google Classroom (Google Classroom) Google Classroom is a free learning platform included in Google Workspace for Education. It is used as a standard tool in many elementary, middle, and high schools that have adopted Chromebooks as part of the GIGA School Initiative. It integrates seamlessly with familiar tools such as Google Docs and Google Forms, allowing you to distribute and grade assignments. Available for free (Education Fundamentals) Fully integrated with Google Workspace (Drive, Docs, Meet, etc.) Features for smooth communication between students and teachers ■Recommended for schools that: Have deployed Chromebooks school-wide / Routinely use Google tools ■Google Classroom Official Website 3. Microsoft Teams for Education Microsoft Teams for Education is a hub tool that, in addition to chat and video conferencing features, offers assignment management capabilities specifically tailored for education. It integrates seamlessly with Office 365 applications such as Word, Excel, and PowerPoint. It is used in various types of schools, particularly those that have adopted Windows devices as part of the GIGA School Initiative. Seamless integration with Office 365 applications High-quality online classes (video conferencing) and chat features Detailed assignment management features utilizing rubric-based assessments ■ Recommended for schools that: Primarily use Windows devices and Office software / Conduct frequent online classes ■ Microsoft Teams for Education Official Website 4. Moodle Moodle is the most widely used open-source LMS at universities and higher education institutions worldwide. The system itself is free to use and is typically deployed on the school’s own servers or in a cloud environment. Its appeal lies in its high degree of flexibility, allowing for countless functional extensions through plugins; however, specialized IT knowledge and technical skills are required for setup, maintenance, and operation. Open-source software with no license fees; a wealth of plugins and extensibility provided by a global developer community; multilingual support and a proven track record of large-scale operations ■Recommended for schools that: Have a dedicated IT department or technical staff on campus / Wish to fully customize the system to meet their institution’s unique requirements ■Moodle Official Website 5. manaba manaba is a Japanese LMS provided by Asahi Net Co., Ltd., with one of the highest adoption rates among universities in Japan. It is designed specifically for managing university courses, allowing for the collection of report assignments, attendance tracking, quizzes, and surveys—all within a single system. It has a proven track record of integration with academic management systems and is designed to align closely with the operational workflows of Japanese universities. Overwhelming adoption rate at Japanese universities and junior colleges; Portfolio feature that promotes two-way communication between faculty and students; Extensive expertise in integrating with Japanese academic management systems ■Recommended for: Universities and junior colleges seeking to transition to paperless lectures and reduce the workload on faculty ■manaba Official Website 6. Canvas LMS Canvas LMS is an LMS provided by the U.S.-based company Instructure, which holds a significant market share among higher education institutions overseas. It features an intuitive and modern user interface and is renowned for being easy to use for both faculty and students. It supports a wide range of APIs and integration with external tools (LTI) and is frequently used at international schools and universities with international programs. High usability thanks to a modern and intuitive UI design; advanced features such as inline video recording and mobile app support; high expandability through open APIs and LTI standard support. ■ Recommended for: Universities and international schools looking to adopt international educational standards ■Canvas LMS Official Website 7. Blackboard Blackboard is a globally recognized LMS with a long history and proven track record, provided by Blackboard, Inc. (formerly Anthology). It is particularly favored by large universities and specialized institutions as a robust platform for advanced learning management and data analysis. It offers a comprehensive set of features that meet strict academic requirements, such as ensuring accessibility and integration with plagiarism detection tools. Robustness and reliability capable of supporting large-scale operations Advanced learning analytics capabilities Ability to meet strict assessment and compliance requirements ■ Recommended for: Large universities and research institutions / Educational institutions seeking advanced learning data analysis ■ Blackboard Official Website Return to Table of Contents 3 Recommended AI-Powered Learning Materials and Adaptive Learning Services to Use with an LMS Alongside LMS implementation, the adoption of AI-powered, personalized learning materials is gaining momentum. Here, we introduce three AI-powered learning materials with a proven track record in educational settings. What Are AI Learning Materials? How Do Their Roles Differ from Those of an LMS? AI learning materials are systems that enable “adaptive learning” (personalized learning), in which AI analyzes data such as learners’ answer histories, study time, and accuracy rates to automatically adjust question content and difficulty based on each individual’s level of understanding and areas of weakness. They support efficient practice through repetition and help students overcome weaknesses. As mentioned earlier, an LMS serves as a “management platform” that oversees all learning activities, while AI-powered learning materials function as “content designed to improve academic performance” within that framework. AI-powered learning materials are delivered through the LMS, and grades and study time are centrally managed within the LMS. By combining and utilizing these two elements in this way, it is possible to effectively support the academic improvement of each student while reducing the administrative burden on teachers. 1. Surara: Surara is a grade-free AI-powered learning program provided by Surara Net Co., Ltd. Since animated characters conduct lessons in an interactive format, the program is designed to be accessible even to students who feel anxious about studying. Another key feature is that it uses AI to analyze students’ learning progress and identify areas where they are struggling, allowing them to review material from previous grades as needed. Since students can progress at a pace tailored to their individual level of understanding, the program is designed to help solidify foundational academic skills. It supports a wide range of grade levels from elementary school through high school and is used not only by schools aiming to improve foundational academic skills but also for providing learning support to students who are not attending school and in correspondence high schools. ■ Surara Official Website 2. Qubena Qubena is an AI-powered learning tool provided by COMPASS Co., Ltd. As the use of one device per student advances under the GIGA School Initiative, it is one of the services seeing widespread adoption in public education settings. It covers the five core subjects for elementary and junior high schools. Based on students’ answer data, the AI generates questions tailored to each individual’s level of understanding. A key feature is its ability to facilitate personalized learning by allowing students to progress at a pace that matches their specific challenges and proficiency levels. It also supports handwritten input, making it well-suited for use on tablet devices. There are case studies of its implementation in public elementary and junior high schools, as well as examples aimed at reducing the workload on teachers and providing learning support tailored to each individual student. ■Qubena Official Website 3. atama+ (Atama Plus) atama+ is an AI-powered educational tool for middle and high school students provided by atama plus Inc. Its key feature is that AI analyzes students’ comprehension levels and the root causes of their difficulties, automatically creating personalized learning curricula for each student. Rather than simply having students repeat problems they struggle with, it allows them to trace back to the root cause—"why they don’t understand"—making it an effective tool for deepening understanding efficiently. Originally, the service gained traction primarily through use in cram schools and has since been adopted by over several thousand classrooms nationwide. In recent years, it has also been utilized for pre-university education and to reinforce foundational academic skills for students accepted through recommendation-based admissions, and its use is expanding among educational institutions such as schools and universities. ■ atama+ Official Website Return to Table of Contents Summary of Recommendations by School Type The key points to prioritize and the services that best fit each setting vary by school type. Here, we have organized recommended LMSs and AI-based learning materials by school type in tabular format. Recommended LMSs by School Type An LMS serves as the operational foundation that supports the school’s overall learning activities, including the distribution of learning materials, grade management, and the accumulation of learning histories. We have compiled a list of LMSs that are well-suited to each school type based on its scale and operational style. School Type Recommended LMS Selection Criteria Elementary School Google Classroom / learningBOX Compatibility with GIGA devices, ease of use Middle School Google Classroom / Microsoft Teams for Education / learningBOX Flexibility in assignment management and support for regular exams High School (Full-time) Google Classroom / Microsoft Teams for Education / learningBOX Assignment management and quizzes for college entrance exam preparation Correspondence High Schools learningBOX Report management, on-campus session management, and evaluation by criteria; AI-assisted lesson material creation and report grading assistance Universities manaba / Moodle / Canvas LMS / Blackboard / learningBOX Large-scale course enrollment management, plus preparation for certification exams and CBT administration Vocational Schools learningBOX / Moodle / Blackboard: CBT exams, certificate issuance, and course management. Tutoring Centers and Prep Schools: learningBOX: Learning material distribution, grade management, and sales functionality. Get a free consultation to find the plan that best fits your school. Implementation Inquiry Form. Recommended AI Learning Materials by School Type: AI learning materials are educational content that automatically adjusts question content and difficulty levels based on each student’s level of understanding. Here, we’ve compiled a list of easy-to-use AI learning materials tailored to the learning objectives and student circumstances of each school type. School Type Recommended AI Learning Materials Purpose Elementary School Qubena Reinforcing foundational academic skills Middle School Qubena / Surara Solidifying foundational knowledge High School (Full-time) atama+ / Surara Entrance exam preparation Correspondence High School Surara / atama+ Individualized optimization University atama+ (For remedial purposes) Pre-enrollment education and foundational reinforcement Vocational Schools atama+ (Reinforcement of foundational academic skills) Supplementary lessons for qualification preparation Cram Schools atama+ Specialized in individualized instruction Return to Table of Contents Key Points to Avoid Failure When Implementing an LMS for Schools Implementing an LMS isn’t the end of the process; it only demonstrates its value when it’s actually used in the classroom. Here, we explain common pitfalls during implementation and how to avoid them. Pitfall 1: Teachers on the ground cannot master the system. Even after implementing an LMS, if teachers feel that “the operation is too complicated” or “it adds to the burden of lesson preparation,” the system may gradually fall into disuse. It is important not to focus solely on a wide range of features, but to verify during the selection process whether the system has a user interface (UI) that is intuitive to use. Additionally, it is essential to conduct training sessions for faculty and staff during implementation and to clearly define user manuals and support channels. A thorough follow-up system for the classroom is crucial to the success of the system’s adoption. Failure Pattern 2: Incompatibility with Existing Systems (School Administration and Core Systems) Operations that require manually entering student information into the LMS or transferring grade data to Excel may actually increase the workload for faculty and staff. To avoid this situation, it is important to confirm in advance how the system integrates with existing school administration support systems and authentication infrastructure. Support for single sign-on (SSO) via SAML or SCIM, as well as API integration, makes it easier to streamline user management and grade management. On the other hand, automatic integration between systems may be restricted depending on educational information security policies or local government operational rules. Therefore, it is also important to verify whether the system supports the bulk import and export of user information and grade data via CSV. By verifying these details in advance based on your school’s security requirements and operational policies, you can more easily minimize the operational burden after implementation. Common Mistake #3: Choosing Based Solely on Price If you choose a system simply because “it’s free” or “it’s the cheapest,” you may later find yourself in situations such as “the necessary features were expensive add-ons” or “the data storage capacity was insufficient, resulting in additional costs.” If a free plan is available, be sure to check in advance what features are included and whether there are any limits on the number of users or file storage capacity. It is important to assess cost-effectiveness by calculating the TCO (Total Cost of Ownership), which includes not only the initial costs but also the running costs over several years. 3 Steps to a Successful Implementation To ensure a successful LMS implementation, we recommend following these three steps. Step 1 (Requirements Definition) Identify your school’s challenges and clarify “who will use which features and for what purpose.” Step 2 (Trial) Use the free plans or trial versions of candidate LMSs to conduct test operations with a few teachers and evaluate usability, including ease of operation. Step 3 (Phased Implementation) Rather than rolling out the system to the entire school at once, start small with specific grade levels or subjects. Build success stories and share best practices as you gradually expand the implementation. The key to successfully implementing an LMS lies not only in “selecting the system” but also in considering “how to ensure it takes root in the classroom.” By focusing on advance preparation and a phased rollout, you can minimize the risk of failure and ensure effective utilization. Learn about common pitfalls and countermeasures during a free consultation. Consult online. Return to Table of Contents. Summary | learningBOX offers flexible implementation regardless of school type. In this article, we’ve compared and explained how to choose an LMS for schools, the differences between LMSs and AI-powered learning materials, and recommended services best suited for various school types. To recap the key points for selecting an LMS, the following four factors are essential: Compatibility with School Type: Does the system offer features suited to your school’s “type” (elementary, middle, high school, university, vocational school, cram school, etc.), size, and operational style? Cost: Compare total costs—including not only initial and monthly fees but also pricing structures for adding user accounts and optional features. Operational Burden: Is the system designed so that teachers on the ground can continue using it without strain—featuring integration with school administration and core systems, intuitive operation, a user-friendly UI, and ease of setting up and processing annual updates and class changes? Support System: Does the service offer comprehensive support tailored to educational institutions, including setup assistance during implementation, operational training, Japanese-language customer support, and security consultations? Among the many LMS options available, learningBOX is a platform that can meet a wide range of educational institutions’ needs. It offers a free trial for up to 10 accounts, and implementation starts at just 5,500 yen (tax included) per month for 100 accounts, making it ideal for schools looking to utilize an LMS while keeping costs low. It also features robust tools for creating teaching materials, including 14 types of quizzes and tests. Even teachers who are not tech-savvy can use it intuitively, reducing the burden of creating teaching materials and tests. Support for SAML and SCIM, along with API integration, streamlines user management and the synchronization of grade data, enabling smooth and hassle-free operations. Another key benefit is its ability to streamline daily tasks such as question creation, grading, information sharing, and learning material management. AI assists with question generation, report grading, and rubric evaluations. Sharing information with students and parents, as well as compiling survey results, is seamless. Learning materials and meeting documents are centrally managed. The system also supports learning designs tailored to previewing, reviewing, homework, and learning plans tailored to proficiency levels. By streamlining administrative tasks, teachers can more easily secure the “time to engage with students”—the very focus of their role. learningBOX is an LMS designed to achieve both a reduction in administrative burden and an improvement in the quality of instruction. If you’re a school administrator looking to take your school’s use of ICT to the next level, we invite you to experience its ease of use for yourself. Case Studies & Demos | User Guide for Schools and Tutoring Centers | Consult with Our Specialists (Free) | Click Here for a Free Consultation | Back to Table of Contents | FAQ | Q1. What is an LMS for schools? An LMS for schools is a learning management system that centralizes the distribution of teaching materials, course management, and grade tracking, while providing visibility into students’ learning progress. Q2. What is the difference between an LMS for schools and an LMS for businesses? The key difference is that an LMS for schools supports functions specific to educational settings—such as grading, parent communication, and attendance tracking—while an LMS for businesses specializes in training management and compliance education. Q3. What is the difference between an LMS and AI-powered learning materials? An LMS serves as the foundation for learning management, handling the delivery of learning materials and grade management, while AI-powered learning materials are educational content that automatically adjusts questions based on students’ level of understanding. Q4. How should I choose an LMS for schools? It is important to compare options based on six criteria: suitability for the school type, ease of creating learning materials, price, support system, security and certification status, and compatibility with core systems. Q5. What LMS is recommended for vocational schools? LMS platforms such as learningBOX, Moodle, and Blackboard—which support CBT exams and certificate issuance—are well-suited for vocational schools. Q6. Which LMS is recommended for schools? Recommendations vary by school type: Google Classroom for elementary, middle, and high schools; manaba for universities; and learningBOX for a wide range of school types and cram schools. ▼Also Recommended! Related Articles Return to Table of Contents

 Choose the Right System to Train Global Talent - 3 key factors for SMEs
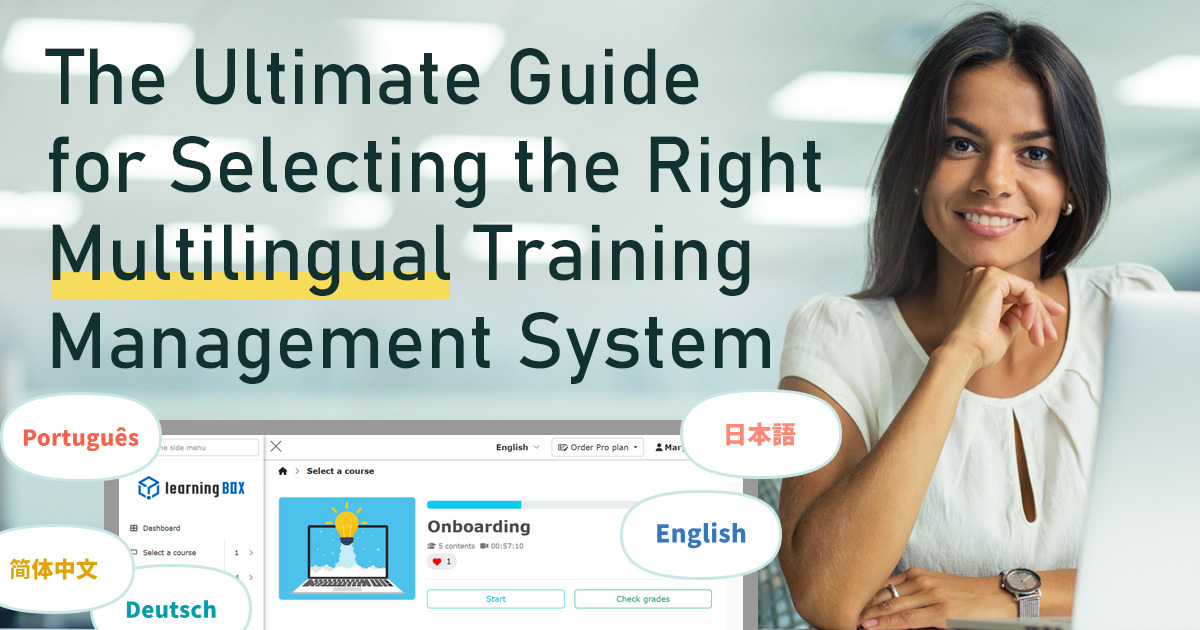 The Ultimate Guide for Selecting the Right Multilingual Trainng Management System
 Human Resource Development Grant for e-Training
 Memorization Strategies
 How to Create Your Own Aptitude Test